Blog

  • Doctor Who Series 15 Episode 6 Review: The Interstellar Song Contest

    Doctor Who Series 15 Episode 6 Review: The Interstellar Song Contest

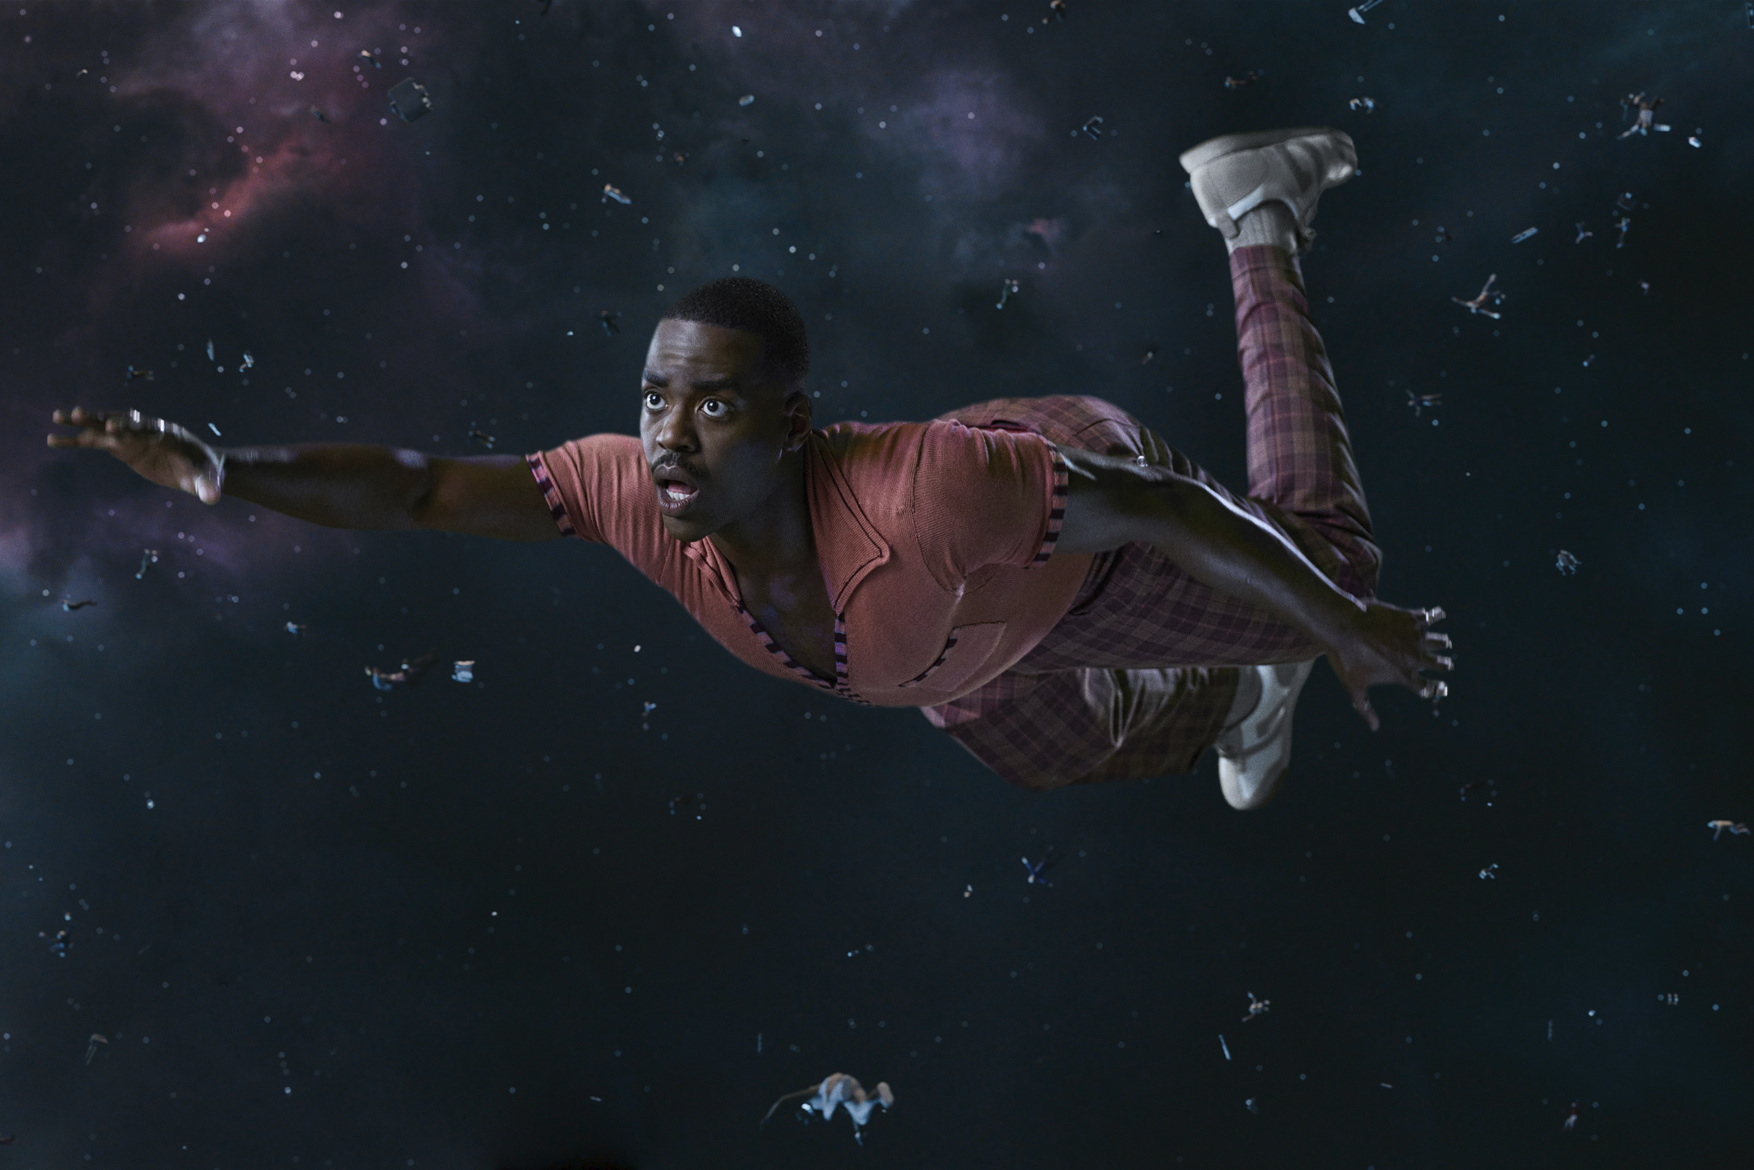
    Warning: contains spoilers for Doctor Who episode “The Interstellar Song Contest” The Doctor and Belinda find themselves on Harmony Arena during the 803rd Interstellar Song Contest. But an evening of camp cosmic fun becomes a nightmare when horned aliens take over the space station – and the Doctor starts having strange visions. Spoilers ahoy. With […]

    The post Doctor Who Series 15 Episode 6 Review: The Interstellar Song Contest appeared first on Den of Geek.

    This article contains full spoilers for every Final Destination movie, INCLUDING Bloodlines.

    For more than a decade, we thought we’d finally made it. It’s been 14 years since the last Final Destination film, the last time Death started killing off those who escaped its plan in exceedingly gruesome fashion. We thought we were free to go to theaters in safety once more. But as the mortician William Bludworth, played by the late great Tony Todd, has taught us, there’s no escaping Death.

    The franchise is back with one of its best entries: Final Destination Bloodlines, written and directed by newcomers to the franchise Zach Lipovsky and Adam Stein. Bloodlines has a shinier look and a different approach, focusing on a family instead a group of random teens. But it follows the well-established principles of a Final Destination movie, especially in its incredible kills.

    In celebration of Bloodlines bringing Final Destination back to screens, we’re ranking all of Death’s achievements across the franchise. Because Final Destination movies are ultimately about good, gory fun, we’re ranking them from the most boring to the most enjoyably incredible.

    Like Death itself, we do have a few rules here. We aren’t counting any deaths in the premonitions that open each movie, nor the mass casualties that occur in the actual events, which means that you won’t see the infamous pile-up from Final Destination 2 or the incredible tower sequence that opens Bloodlines. Also we’re focusing on Death’s kills, so kills done by human beings don’t count. Even with those restrictions, Final Destination gives us plenty of memorable kills, as Death always makes a show of getting even.

    40. Alex Browning’s Off-Screen Demise (Final Destination 2)

    Is it a mark of respect that the first movie’s protagonist Alex Browning (Devon Sawa) doesn’t die on screen? Or is it the ultimate insult that we learn via newspaper clipping in Final Destination 2 that he was knocked in the head with a brick? Interpretations may vary, but no one can disagree that Alex’s death deserves the bottom spot.

    39. Dennis Lapman Gets a Wrenching Headache (Final Destination 5)

    Played by comedy great David Koechner, paper plant boss Dennis Lapman of Final Destination 5 has one of the gnarliest premonition deaths. Dangling off a collapsing bridge, Dennis almost pulls himself back up when he’s doused with hot tar, burning alive as he lets go and drops to the water. That incredible end makes his actual expiration all the worse, as he goes out when a loose wrench on a shop floor gets hurled into his head, no real setup involved.

    38. Wendy Cristensen, Julie Cristensen, and Kevin Fischer Crash Off-Screen (Final Destination 3)

    With the exception of the original Final Destination, the protagonists end their films thinking they’ve beaten Death only to realize that the Grim Reaper has one more trick up his sleeve, and the movies end with shocking cuts. The worst of them comes in Final Destination 3, one of the weaker entries overall, in which Wendy Cristensen (Mary Elizabeth Winstead), her sister Julie (Amanda Crew), and pal Kevin Fischer (Ryan Merriman) all perish in a train crash.

    Technically we see them meet their end in impressive carnage, but that all happens in a premonition, which this list rules out. So we have to go with the death that happens onscreen—well, on soundtrack, as the movie cuts to black with the sound of the crash.

    37. Janet Cunningham, Lori Milligan, Nick O’Bannon Death By X-Ray Truck (The Final Destination)

    Easily the worst of the series, the fourth entry The Final Destination also ends with a sudden attack on the protagonists. In this case, Nick O’Bannon (Bobby Campo), his love interest Lori Milligan (Shantel VanSanten), and her friend Janet Cunningham (Haley Webb) meet in a coffee shop to celebrate life, only for a truck to crash into the building. It’s a lot like the third movie’s ending, but at least this movie gives us neat x-rays to look at and imagine what horrible things happened to our heroes.

    cnx.cmd.push(function() {
    cnx({
    playerId: “106e33c0-3911-473c-b599-b1426db57530”,

    }).render(“0270c398a82f44f49c23c16122516796”);
    });

    36. George Lanter and the Very Quiet Ambulance (The Final Destination)

    Played by the great Mykelti Williamson, George Lantner is the only character who acts like a human being in The Final Destination. So it’s a bit lame that the movie kills him off with a gag when he steps onto the road and gets flattened by an oncoming ambulance. He mentions “deja vu” right before it happens because his end is a callback to a similar one from the first film, which will be talked about shortly. It’s an unimaginative death and a mean joke at the expense of a likable character, which lands it toward the bottom of the list.

    35. Nadia Monroy Makes Nick’s Dream a Reality (The Final Destination)

    For the most part, this list is ignoring both the premonitions and the mass casualties that occur after a premonition. The one exception comes with Nadia Monroy (Stephanie Honoré) of The Final Destination, who dies in the immediate aftermath of a premonition. After Nick has a vision of a massive Nascar wreck, he panics, which gets a group of people kicked out of the race just as the accident begins. As the survivors try to make sense of what happened, a tire flies out of the stadium and through Nadia’s head, replicating her death from the vision.

    34. Perry Malinowski Salutes the Flag (Final Destination 3)

    Final Destination loves its out-of-nowhere surprise kills. A character thinks they’re safe, they make some ironic statement and, bam, they’re immediately dead. Usually, these kills aren’t nearly as funny or clever as the movies think they are, especially compared to the elaborate sequences that have become the franchise’s calling card. One of the worst comes when Perry Malinowski (Maggie Ma) gets unceremoniously offed when a loose horse breaks of a flagpole that goes through her chest, a forgettable death for a forgettable character. Horse looks cool though.

    33. Darlene Campbell Stays at the Cabin (Final Destination Bloodlines)

    Although not as meta as, say, a Scream movie, the characters in Final Destination: Bloodlines know how Final Destination movies work. To the filmamkers’ credit, the knowledge adds tension to the movie, underscoring how knowledge doesn’t give them power to evade Death. Nowhere is that more clear than at the climax of Bloodlines when Darlene Campbell (Rya Kihlstedt)—a mother who has estranged herself from her children—decides to hide in her own mother’s bunker, thereby stalling Death’s hit list and saving her children. Noble though the sentiment may be, Darlene’s proclamation of love for her children distracts her, and she gets smashed by a falling pole, rendering her heroism moot.

    32. Carter Horton Finally Sees the Sign (Final Destination)

    Played by Kerr Smith, Carter Horton is the onscreen antagonist of the first film, an annoying preppie who bullies Alex and the others and somehow gets to survive. So while we don’t actually see Carter get killed before the screen cuts to closing credits, his demise does rank above those from the third and fourth movies just because we wanted to see this guy get it for so long.

    31. Samantha Lane Has Her Eye on a Stone (The Final Destination)

    The overwhelming majority of Final Destination victims are obnoxious, good-looking teens who mostly deserve to die. Wife and mother Samantha Lane (Krista Lane) certainly isn’t a saint but she doesn’t irritate us like every other jerk in The Final Destination. So we’re a bit annoyed that she gets such a cruel death when a lawn mower kicks up a rock that flies through her eyes while her young kids watch in horror. The kill does get a few extra points, however, for all of the playfulness before it actually happens, as Death sets up a few options to off Sarah before finally picking the rock.

    30. Ian McKinley Splits the Fair (Final Destination 3)

    The franchise has never done great with its human antagonists, the regular guys who get tired of all the dying and take things into their own hands by killing the other characters. Ian McKinley (Kris Lemche) stands out a little bit more than the others. Instead of showing all the things that could off him, the camera simply follows Ian through a crowd while he rants about his immortality. That’s a bit dull, but it pays off when a firework shoots by him, apparently sparing him, only for the explosion to knock over a cherry picker that splits him in half. That extra beat is enough to make his sudden surprise kill a bit more satisfying.

    29. Stefani and Charlie Reyes in a Logjam (Final Destination Bloodlines)

    Although a bit glossier and a bit kinder with its characters, Final Destination Bloodlines follows the beats of most entries in the franchise. In fact, its final moment, in which protagonists Stefani (Kaitlyn Santa Juana) and Charlie Reyes (Teo Briones) realize that they did not, in fact, stop Death and are about to die, feels like a callback to the infamous log premonition in Final Destination 2. However, Bloodlines ups the stakes with a lucky penny leading to a train derailment. The amazing shot of Stefani and Charlie goes bigger than any of the other movies’ shock ending, undone some by the cheap effects when two logs from the train car come loose and flatten our heroes.

    28. Sam Lawton and Emma Bell Die in a Callback (Final Destination 5)

    Final Destination 5 has the best ending of the series, in which protagonists Sam Lawton (Nicholas D’Agosto) and Emma Bell (Molly Harper) survive the ordeal and board a plane to celebrate. It’s only then that we realize that the movie has taken place in 2000 and that they’re boarding Flight 180, the one that explodes at the start of the first movie. Thus we have to watch as the characters who have gone through so much die, but we also get to see the original disaster that started it all. Emily splatters when she gets sucked out of the plane and sliced by the wing, but Sam’s death isn’t that spectacular outside of the fact that he burns up in the same manner as Alex did in his vision.

    27. Tod Waggner Hung Out to Dry (Final Destination)

    The first “real” death of the series, Tod Waggner’s (Chad E. Donella) end feels like a first draft to the spectacular kills to come. When water leaks from a toilet, Todd slips into the tub and gets a laundry cord wrapped around his neck. Todd’s desperate attempts to stand up and save himself, frustrated by the slick tub floor, give the death a level of pathos rarely seen in the series, but outside of that, it’s a fairly rote kill for the overall franchise.

    26. Iris Campbell Gets to the Point (Final Destination Bloodlines)

    Bloodlines gives Tony Todd a glorious final scene as Bloodworth, but it’s the elderly Iris Campbell (Gabrielle Rose) who tells her granddaughter Stefani the rules of Death’s design. Throughout the exposition dump, the camera points to various classic setups, but Iris catches them all. So when Death does finally take her, using a flying fire extinguisher to send a weathervane point through her face, it’s because Iris wants to show Stefani how Death operates. That intentionality makes Iris’ end stand out, even if it isn’t the most elaborate on this list.

    25. Rory Peters Goes Fencing (Final Destination 2)

    Final Destination 2 has the best premonition in the series, an incredible accident and pile-up filled with ghastly incidents. Toward the climax of the movie, that road destruction gets sort of recreated when a series of events launched by a car crash suddenly kill off other characters. It’s mostly fun, and wide shots let us see Death’s composition, but it’s hard to get too excited when stoner Rory Peters (Jonathan Cherry) gets split into thirds by flying fencing.

    24. Clear Rivers and Eugene Dix Go Up in Flames (Final Destination 2)

    It was a nice reveal to show Clear Rivers (Ali Larter) had survived even the post-credit carnage of the first Final Destination to provide information to the victims of the second film. But that surprise was completely undercut by the film then killing Clear in a sudden hospital explosion, taking teacher Eugene (T.C. Carson), one of the more compelling characters in the movie, out along with her. Multi-victim kills always feel like a bit of a cheat, but at least this one had a nice build-up.

    23. Carter Daniels’ Hate Crime Backfires (The Final Destination)

    The Final Destination‘s unlikable cast goes to the extreme when white supremacist Carter (Justin Welborn) singles out George Latner as the cause of his wife’s demise. So it’s especially satisfying when Carter, in the midst of burning a cross on George’s lawn, gets dragged behind his truck and burned alive. Carter may not get the most creative of kills, but rarely do we see such an awful person get their full and just reward like that.

    22. Isaac Palmer Meets the Buddha (Final Destination 5)

    Unlike most entries, Final Destination 5 limited its nastiness to one character, and even then, actor P. J. Byrne knows how to find light notes in his depiction of smarmy exec Isaac Palmer. Byrne sleezes it up as Isaac steals a spa coupon from recently-deceased co-worker, leers at spa workers, and then condescend to the worker who performs upon him. From then on, it’s a classic Final Destination sequence, as a fallen candle ignites spilled oil to send Isaac pin-first onto the ground, crawling away until he inadvertently pulls a Buddha statue on his head, his karma fully earned.

    21. Kat Jennings and the Jaws of Death (Final Destination 2)

    Nervous wreck Kat Jennings (Keegan Connor Tracy) gets one of the better sudden deaths in the series, largely because Death puts all the pieces in place for a symphony of chaos and then sets it off suddenly. Kat initially survives the car crash, avoiding the pointy pipe that ran through her back window and continues to stick out behind her head. When firefighters use the jaws of life to pry open her car door, however, the impact is enough to set off the airbags, slamming Kat’s head into the spike and setting off more carnage.

    20. Lewis Romero Loses Weight in the Gym (Final Destination 3)

    A lot of the kills on this list are preceded by a character declaring their immortality, but few do it with as much apblomb as Final Destination 3‘s aggro jock Lewis Romero (Texas Battle). Like many Lewis responds to Death’s machinations by asserting his own free will… loudly. At the end, he does it while pumping iron in the gym, and his protestations shake the walls, knocking free swords used as part of his team’s decor. The swords cut the bands of his machine as they fall, freeing the weights to smash his head. Given that it was his actions that made the swords drop, Lewis did kind of control his own fate.

    19. Nora Carpenter and the Creepy Hook Hand (Final Destination 2)

    Of all the kills on this list, the death of nervous mom Nora Carpenter (Lynda Boyd) seems the easiest to avoid. Well, at first anyway, when she rushes into an elevator and gets her hair caught on a hook, part of the prosthetic limbs that a creepy guy holds in a box. If Nora just settled down for a moment, or if the creepy guy would put as much effort into untangling her as he does smelling her hair, then she probably could have wrestled free before the elevator decapitated her. All that aside, it’s a pretty amazing and gory kill, one that has enough shock value to overcome any logistical leaps.

    18. Erin Ulmer Gets Nailed in the Head (Final Destination 3)

    The Final Destination movies are big on dying, but not so big on suffering, which is a good thing. We don’t want to think of these people as human beings, because that would ruin the fun of watching them go out. Erin Ulmer’s (Alexz Johnson) end in Final Destination 3 veers a bit too much toward suffering, as the camera holds on her as she moans in her last moments. Up until that point, though, the scene has fun with misdirection, making us think that we’re about to see Ian McKinley get crushed by boards until Erin gets knocked into a nail gun, which perforates the back of her head.

    17. Jonathan Groves Takes a Bath (The Final Destination)

    On one hand, Jonathan Groves (Jackson Walker) feels like he was added to The Final Destination late in production because the producers found out the movie’s running a bit too short. Groves does show up in the opening crash scene, but we lose track of him and assume he’s dead until Nick sees him on the news. But we can forgive the shoehorning for the purely absurd way that Groves goes out, with an overfilled bathtub from the hospital floor above crashing down onto his bed.

    16. Nathan Sears and Flight 180’s Landing (Final Destination 5)

    In addition to its fantastic kills Final Destination 5 also has the most well-rounded characters in the series, characters like junior executive Nathan Sears (Arlen Escarpeta). Nathan is fundamentally a nice guy but he gets caught up in a dispute with an older union leader, a dispute that ends when the leader accidentally dies during a fight. Thinking that was Death coming for him, Nathan comes to the leader’s wake to pay respects, secure in the belief that Death has skipped him. That assumption adds some pathos to the moment with gear from Flight 180 falls from the sky and crushes him, taking both good people and bad people.

    15. Frankie Cheeks Trapped in the Drive Thru (Final Destination 3)

    Frankie Cheeks (Sam Easton) is one of the most unlikable characters in the franchise (which is saying something) and we don’t even know that he’s dead until after it happens. So why does it rank relatively high on this list? Because of the way it’s set up, looking very much like protagonists Wendy and Kevin are going to get killed in an unbelievable but well-orchestrated drive-through accident. While our heroes escape in time, a collision still occurs, sending a huge engine fan into the back of Frankie’s head. At first it seems like the duo passed their death onto an innocent bystander until we see a bloody necklace in the shape of a naked lady, and we all breathe a sigh of relief that Frankie Cheeks walks the Earth no more.

    14. Tim Carpenter Gets Squished By Glass (Final Destination 2)

    Tim Carpenter may be the weirdest character in the entire series. The script says he’s 15, and actor James Kirk sometimes plays him as a teen and sometimes as an eight-year-old, which ends up feeling like he’s the MadTV character Stuart. That childlike nature leads to Tim’s end when, like a dumb kid, he just decides to chase after some pigeons because… they were there? The pigeons take flight, knocking a giant pane of glass off of a crane and sending the glass on top of Tim, smooshing the little weirdo.

    The biggest problem with The Final Destination is its reliance on CG blood, a scourge of 2000s horror. Still, sometimes the kills are so outrageous that we can forgive the poor effects. Such is the case when mechanic Andy Kewzer (Andrew Fiscella) gets blown into a chain link fence. It looks silly when his body collapses into goopy chunks, but the setup is satisfying, as is the sight of him getting blasted out of his garage into the instrument of his doom.

    12. Terry Chaney Hit By a Silent Bus (Final Destination)

    For the first viewers of Final Destination, Terry Chaney (Amanda Detmer) had the standout death. Freaked out by Alex’s talk of Death coming for them all, Terry tells her friends to drop dead, steps into the street and gets splattered by a bus. It’s a funny moment, as long as you don’t think about it for a second (none of her friends have peripheral vision? The bus driver doesn’t see the gesticulating lady backing into the street?), and it got cheers in the theater. Over time, however, the sudden shock death has become a series trope, dulling the impact (pun intended) of Terry’s end.

    11. Howard Campbell Gets a Trim (Final Destination Bloodlines)

    Patriarch Howard Campbell (Alex Zahara) gets the first classic-style death in Bloodlines, and what a glorious one it is. Occurring after the film has clearly laid out Death’s rules and process, the filmmakers luxuriate in the setup, taking time to highlight all of the things that could kill someone in Campbell’s well-appointed suburban backyard: a rake under a ripping trampoline, a shard of glass in an iced drink, a hose about to explode. After several minutes of anticipation, all of those things come together to set-off something we never saw coming, an electric self-propelled lawnmower, which runs over the face of the prone Howard.

    10. Billy Hitchcock Loses His Cool, Also His Head (Final Destination)

    Iconic as it may be, Terry’s isn’t the best sudden shock death in the first Final Destination movie. That honor belongs to New York Rangers superfan Billy Hitchcock (Seann William Scott), who also dies without much obvious setup from Death. Billy goes after he and Alex confront the ever-jerky Carter, who decides to defy Death by parking on train tracks. Carter survives, but Billy can’t take it and starts having an angry meltdown, a meltdown cut short when the train kicks up a piece of shrapnel and sends it flying through Billy’s neck.

    9. Valerie Lewton Learns About Kitchen Safety (Final Destination)

    Tod may be the first death in the Final Destination series, but Valerie Lewton (Kristen Cloke) gets the first great death of the franchise. Still shaken up over the explosion of Flight 180, teacher Mrs. Lewton spills some alcohol on the ground while making dinner. When her cooking goes awry, the alcohol ignites, setting her house ablaze. But it’s not the fire that kills her. Rather she dies when she accidentally pulls a knife down from the counter, which embeds itself in her chest.

    8. Evan Lewis Slips on Spaghetti (Final Destination 2)

    Sometimes Death orchestrates events in such an improbable manner that we can almost see a physical hand onscreen, manipulating events. Sometimes dumb people do dumb things and pay for it. It’s the latter event that brings down lottery-winning bro Evan Lewis (David Paetkau) in Final Destination 2, who just tosses a pot of spaghetti out the window. That decision proves disastrous when Death’s meddling leads to a fire in Evan’s apartment. Evan climbs out to make an escape, but he slips on his own spaghetti, which leaves him vulnerable to the falling ladder that pierces his eye.

    7. Brian Gibbons BBQ Bomb (Final Destination 2)

    Although it’s a sudden kill with little setup, the death of Brian Gibbons (Noel Fisher) ranks so high because of how funny it is. At the end of the movie, survivors Kimberly Corman (A.J. Cook) and Thomas Burke (Michael Landes) join the Gibbons family at a BBQ where they all let off a bit of steam. No sooner does Brian joke about his and his father’s near-death experience than the grill he’s using explodes, sending his severed arm flying through the air. The arm lands on his mother’s plate, a darkly funny beat that makes it one step better than the average out-of-nowhere kills in the series.

    6. Erik and Bobby Campbell Bond in the Hospital (Final Destination Bloodlines)

    Erik Campbell (Richard Harmon) is truly a unique character in the Final Destination franchise. First of all, he seems to survive his own elaborate death, a hilarious incident in a tattoo parlor (featured heavily in teasers). Secondly he and his brother Bobby (Owen Patrick Joyner) actually like each other, which makes their end so poignant.

    Off of Bludworth’s information, Erik decides to send the highly allergic Bobby into anaphylaxis so he can revive him, thus satisfying Death. But Erik gets too cute with his plan, and his action accidentally turns on and revs up an MRI machine in the room where the brothers are working. The intensified magnification first pulls in and crushes Erik, with his piercings in front and a wheelchair in back, and then snags a coil from a vending machine, sending it through Bobby’s head.

    5. Olivia Castle’s Laser-Guided Fall (Final Destination 5)

    Okay, technically Olivia Castle (Jacqueline MacInnes Wood) dies when she falls out of a window. But that’s not the part that sticks out in our mind. Instead we remember everything before that moment when Olivia gets laser eye surgery. As if torn from the worst thoughts of anyone about to get the surgery, we watch as Death shorts out the laser while the tech is out of the room and starts burning out Kimberly’s eye. No sooner does she escape than she slips on her beloved teddy bear and falls through the window, a somehow merciful end to the suffering.

    3. Ashley Freund & Ashlyn Halperin’s Tanning Session Gone Wrong (Final Destination 3)

    As this list shows, great Final Destination deaths fall into one of three categories: memorably mean, patently absurd, or impeccably designed. Ashley Fruend (Chelan Simmons) and Ashlyn Halperin (Crystal Lowe) are the prime examples of the first category. A pair of stock mean mall girls, Ashley and Ashlyn go to their favorite tanning spa, giant-size sodas in hand. Death ups the condensation on the drinks, which creates enough water to short out the beds, which turns up the heat, while a fallen shelf keeps them trapped inside. The sight of them burning alive is nasty enough, but the real kicker is the match cut at the end, which replaces two tanning beds with two coffins.

    3. Julia Campbell Takes Out the Trash (Final Destination Bloodlines)

    Final Destination movies love a good fake-out and Bloodlines has the best one yet. Armed with knowledge from Iris, Stefani walks down a suburban street with a skeptical Erik, Death’s next probable victim. As the two walk, Stefani points out all of the things that could kill him: leaves from a blower, a soccer ball kicked by kids, a trash compactor. But to Erik’s mocking glee, nothing happens. Nothing, that is, until Erik’s sister Julia (Anna Lore) goes for a run. In the background. And out of focus, all of those things come together to knock Julia into a roadside dumpster, which is then emptied into the garbage truck where Julia is compacted while Stefani watches.

    2. Hunt Wynorski’s Guts in a Pool Pump (The Final Destination)

    The best patently absurd kill in the entire franchise occurs to obnoxious bro Hunt Wynorski (Nick Zano). After getting into an altercation with a little kid at a public pool, Hunt sits down to catch some rays when he hears his lucky coin fall into the water. Hunt dives in after it, just as Death starts messing with the equipment, causing the pump to malfunction and raise the pressure. The pump traps Hunt at the bottom and he gestures wildly for help, but no one sees him. Instead of drowning, Hunt gets his guts sucked out through his butt, a kill so wonderful that we don’t even care about the CGI viscera that caps off the scene.

    1. Candace Hooper Doesn’t Stick the Landing (Final Destination 5)

    Easily the most glorious and well-composed kill of the entire franchise occurs early in Final Destination 5, when a standard routine for gymnast Candice Hooper (Ellen Wroe) goes horribly wrong. Director Steven Quale takes the time to show viewers the tools and space in which Death works, highlighting dripping water, a shaking girder, spilled dust, and other elements, before bringing them together as Candice goes through her flips. As a result, we understand every step in the system of catastrophes that leads to a ghastly end, with Candice’s crumpled body shuttering on the gym floor.

    The post Final Destination Kills Ranked from the Short and Sweet to Spectacularly Brutal appeared first on Den of Geek.

  • Doctor Who’s Surprise TARDIS Cameo Explained

    Doctor Who’s Surprise TARDIS Cameo Explained

    Warning: contains clues for Doctor Who season” The Prometheus Song Contest”. Surprise! Carole Ann Ford is up on Doctor Who as the Doctor’s daughter Susan. In a vision experienced by the Doctor while unconscious and floating in space in new episode” The Interstellar Song Contest”, Susan appears inside the current TARDIS, calls Fifteen” Grandfather” and ]… ]

    The article Doctor Who’s Surprise TARDIS Cameo Explained appeared second on Den of Geek.

    This article contains whole clues for every Last Destination video, Like Dynasties.

    For more than a decade, we thought we’d eventually made it. It’s been 14 times since the last Final Destination movie, the next day Death started killing off those who escaped its strategy in exceedingly gruesome style. We thought we were completely to go to cinemas in safety once more. But as the doing William Bludworth, played by the late fantastic Tony Todd, has taught us, there&#8217, s no escaping Dying.

    The company is up with one of its best comments: Final Destination Bloodlines, written and directed by visitors to the company Zach Lipovsky and Adam Stein. Bloodlines has a shinier glance and a unique approach, focusing on a home rather a group of strange teenagers. But it follows the well-established rules of a Ultimate Destination drama, especially in its outstanding dies.

    In party of Bloodlines bringing Final Destination again to panels, we&#8217, de ranking all of Death&#8217, s efforts across the company. Because Final Destination movies are inevitably about good, gruesome joy, we&#8217, re ranking them from the most tedious to the most satisfyingly amazing.

    Like Death itself, we do have a few rules here. We aren’t counting any deaths in the premonitions that open each movie, nor the mass casualties that occur in the actual events, which means that you won&#8217, t see the infamous pile-up from Final Destination 2 or the incredible tower sequence that opens Bloodlines. Also we’re focusing on Death&#8217, s kills, so kills done by human beings don’t count. Even with those restrictions, Final Destination gives us plenty of memorable kills, as Death always makes a show of getting even.

    40. Alex Browning &#8217, s Off-Screen Demise ( Final Destination 2 )

    Is it a mark of respect that the first movie’s protagonist Alex Browning ( Devon Sawa ) doesn’t die on screen? Or is it the ultimate insult that we learn via newspaper clipping in Final Destination 2 that he was knocked in the head with a brick? Interpretations may vary, but no one can disagree that Alex’s death deserves the bottom spot.

    39. Dennis Lapman Gets a Wrenching Headache ( Final Destination 5 )

    Played by comedy great David Koechner, paper plant boss Dennis Lapman of Final Destination 5 has one of the gnarliest premonition deaths. Dangling off a collapsing bridge, Dennis almost pulls himself back up when he’s doused with hot tar, burning alive as he lets go and drops to the water. That incredible end makes his actual expiration all the worse, as he goes out when a loose wrench on a shop floor gets hurled into his head, no real setup involved.

    38. Wendy Cristensen, Julie Cristensen, and Kevin Fischer Crash Off-Screen ( Final Destination 3 )

    With the exception of the original Final Destination, the protagonists end their films thinking they’ve beaten Death only to realize that the Grim Reaper has one more trick up his sleeve, and the movies end with shocking cuts. The worst of them comes in Final Destination 3, one of the weaker entries overall, in which Wendy Cristensen ( Mary Elizabeth Winstead ), her sister Julie ( Amanda Crew ), and pal Kevin Fischer ( Ryan Merriman ) all perish in a train crash.

    Technically we see them meet their end in impressive carnage, but that all happens in a premonition, which this list rules out. So we have to go with the death that happens onscreen—well, on soundtrack, as the movie cuts to black with the sound of the crash.

    37. Janet Cunningham, Lori Milligan, NickO’Bannon Death By X-Ray Truck ( The Final Destination )

    Easily the worst of the series, the fourth entry The Final Destination also ends with a sudden attack on the protagonists. In this case, Nick O&#8217, Bannon ( Bobby Campo ), his love interest Lori Milligan ( Shantel VanSanten ), and her friend Janet Cunningham ( Haley Webb ) meet in a coffee shop to celebrate life, only for a truck to crash into the building. It’s a lot like the third movie&#8217, s ending, but at least this movie&nbsp, gives us neat x-rays to look at and imagine what horrible things happened to our heroes.

    cnx. cmd. push ( function ( ) {cnx ( {playerId:” 106e33c0-3911-473c-b599-b1426db57530″, }). render ( “0270c398a82f44f49c23c16122516796” ), }),

    36. George Lanter and the Very Quiet Ambulance ( The Final Destination )

    Played by the great Mykelti Williamson, George Lantner is the only character who acts like a human being in The Final Destination. So it’s a bit lame that the movie kills him off with a gag when he steps onto the road and gets flattened by an oncoming ambulance. He mentions “deja vu” right before it happens because his end is a callback to a similar one from the first film, which will be talked about shortly. It’s an unimaginative death and a mean joke at the expense of a likable character, which lands it toward the bottom of the list.

    35. Nadia Monroy Makes Nick&#8217, s Dream a Reality ( The Final Destination )

    For the most part, this list is ignoring both the premonitions and the mass casualties that occur after a premonition. The one exception comes with Nadia Monroy ( Stephanie Honoré ) of The Final Destination, who dies in the immediate aftermath of a premonition. After Nick has a vision of a massive Nascar wreck, he panics, which gets a group of people kicked out of the race just as the accident begins. As the survivors try to make sense of what happened, a tire flies out of the stadium and through Nadia&#8217, s head, replicating her death from the vision.

    34. Perry Malinowski Salutes the Flag ( Final Destination 3 )

    Final Destination loves its out-of-nowhere surprise kills. A character thinks they &#8217, re safe, they make some ironic statement and, bam, they &#8217, re immediately dead. Usually, these kills aren&#8217, t nearly as funny or clever as the movies think they are, especially compared to the elaborate sequences that have become the franchise&#8217, s calling card. One of the worst comes when Perry Malinowski ( Maggie Ma ) gets unceremoniously offed when a loose horse breaks of a flagpole that goes through her chest, a forgettable death for a forgettable character. Horse looks cool though.

    33. Darlene Campbell Stays at the Cabin ( Final Destination Bloodlines )

    Although not as meta as, say, a Scream movie, the characters in Final Destination: Bloodlines know how Final Destination movies work. To the filmamkers &#8217, credit, the knowledge adds tension to the movie, underscoring how knowledge does n&#8217, t give them power to evade Death. Nowhere is that more clear than at the climax of Bloodlines when Darlene Campbell ( Rya Kihlstedt ) &#8212, a mother who has estranged herself from her children&#8212, decides to hide in her own mother &#8217, s bunker, thereby stalling Death&#8217, s hit list and saving her children. Noble though the sentiment may be, Darlene&#8217, s proclamation of love for her children distracts her, and she gets smashed by a falling pole, rendering her heroism moot.

    32. Carter Horton Finally Sees the Sign ( Final Destination )

    Played by Kerr Smith, Carter Horton is the onscreen antagonist of the first film, an annoying preppie who bullies Alex and the others and somehow gets to survive. So while we don&#8217, t actually see Carter get killed before the screen cuts to closing credits, his demise does rank above those from the third and fourth movies just because we wanted to see this guy get it for so long.

    31. Samantha Lane Has Her Eye on a Stone ( The Final Destination )

    The overwhelming majority of Final Destination victims are obnoxious, good-looking teens who mostly deserve to die. Wife and mother Samantha Lane ( Krista Lane ) certainly is n&#8217, t a saint but she does n&#8217, t irritate us like every other jerk in The Final Destination. So we&#8217, re a bit annoyed that she gets such a cruel death when a lawn mower kicks up a rock that flies through her eyes while her young kids watch in horror. The kill does get a few extra points, however, for all of the playfulness before it actually happens, as Death sets up a few options to off Sarah before finally picking the rock.

    30. Ian McKinley Splits the Fair ( Final Destination 3 )

    The franchise has never done great with its human antagonists, the regular guys who get tired of all the dying and take things into their own hands by killing the other characters. Ian McKinley ( Kris Lemche ) stands out a little bit more than the others. Instead of showing all the things that could off him, the camera simply follows Ian through a crowd while he rants about his immortality. That&#8217, s a bit dull, but it pays off when a firework shoots by him, apparently sparing him, only for the explosion to knock over a cherry picker that splits him in half. That extra beat is enough to make his sudden surprise kill a bit more satisfying.

    29. Stefani and Charlie Reyes in a Logjam ( Final Destination Bloodlines )

    Although a bit glossier and a bit kinder with its characters, Final Destination Bloodlines follows the beats of most entries in the franchise. In fact, its final moment, in which protagonists Stefani ( Kaitlyn Santa Juana ) and Charlie Reyes ( Teo Briones ) realize that they did not, in fact, stop Death and are about to die, feels like a callback to the infamous log premonition in Final Destination 2. However, Bloodlines ups the stakes with a lucky penny leading to a train derailment. The amazing shot of Stefani and Charlie goes bigger than any of the other movies &#8217, shock ending, undone some by the cheap effects when two logs from the train car come loose and flatten our heroes.

    28. Sam Lawton and Emma Bell Die in a Callback ( Final Destination 5 )

    Final Destination 5 has the best ending of the series, in which protagonists Sam Lawton ( Nicholas D&#8217, Agosto ) and Emma Bell ( Molly Harper ) survive the ordeal and board a plane to celebrate. It&#8217, s only then that we realize that the movie has taken place in 2000 and that they &#8217, re boarding Flight 180, the one that explodes at the start of the first movie. Thus we have to watch as the characters who have gone through so much die, but we also get to see the original disaster that started it all. Emily splatters when she gets sucked out of the plane and sliced by the wing, but Sam&#8217, s death is n&#8217, t that spectacular outside of the fact that he burns up in the same manner as Alex did in his vision.

    27. Tod Waggner Hung Out to Dry ( Final Destination )

    The first &#8220, real&#8221, death of the series, Tod Waggner&#8217, s ( Chad E. Donella ) end feels like a first draft to the spectacular kills to come. When water leaks from a toilet, Todd slips into the tub and gets a laundry cord wrapped around his neck. Todd&#8217, s desperate attempts to stand up and save himself, frustrated by the slick tub floor, give the death a level of pathos rarely seen in the series, but outside of that, it &#8217, s a fairly rote kill for the overall franchise.

    26. Iris Campbell Gets to the Point ( Final Destination Bloodlines )

    Bloodlines gives Tony Todd a glorious final scene as Bloodworth, but it &#8217, s the elderly Iris Campbell ( Gabrielle Rose ) who tells her granddaughter Stefani the rules of Death&#8217, s design. Throughout the exposition dump, the camera points to various classic setups, but Iris catches them all. So when Death does finally take her, using a flying fire extinguisher to send a weathervane point through her face, it &#8217, s because Iris wants to show Stefani how Death operates. That intentionality makes Iris&#8217, end stand out, even if it is n&#8217, t the most elaborate on this list.

    25. Rory Peters Goes Fencing ( Final Destination 2 )

    Final Destination 2 has the best premonition in the series, an incredible accident and pile-up filled with ghastly incidents. Toward the climax of the movie, that road destruction gets sort of recreated when a series of events launched by a car crash suddenly kill off other characters. It&#8217, s mostly fun, and wide shots let us see Death&#8217, s composition, but it &#8217, s hard to get too excited when stoner Rory Peters ( Jonathan Cherry ) gets split into thirds by flying fencing.

    24. Clear Rivers and Eugene Dix Go Up in Flames ( Final Destination 2 )

    It was a nice reveal to show Clear Rivers ( Ali Larter ) had survived even the post-credit carnage of the first Final Destination to provide information to the victims of the second film. But that surprise was completely undercut by the film then killing Clear in a sudden hospital explosion, taking teacher Eugene ( T. C. Carson ), one of the more compelling characters in the movie, out along with her. Multi-victim kills always feel like a bit of a cheat, but at least this one had a nice build-up.

    23. Carter Daniels &#8217, Hate Crime Backfires ( The Final Destination )

    The Final Destination&#8216, s unlikable cast goes to the extreme when white supremacist Carter ( Justin Welborn ) singles out George Latner as the cause of his wife &#8217, s demise. So it &#8217, s especially satisfying when Carter, in the midst of burning a cross on George&#8217, s lawn, gets dragged behind his truck and burned alive. Carter may not get the most creative of kills, but rarely do we see such an awful person get their full and just reward like that.

    22. Isaac Palmer Meets the Buddha ( Final Destination 5 )

    Unlike most entries, Final Destination 5 limited its nastiness to one character, and even then, actor P. J. Byrne knows how to find light notes in his depiction of smarmy exec Isaac Palmer. Byrne sleezes it up as Isaac steals a spa coupon from recently-deceased co-worker, leers at spa workers, and then condescend to the worker who performs upon him. From then on, it &#8217, s a classic Final Destination sequence, as a fallen candle ignites spilled oil to send Isaac pin-first onto the ground, crawling away until he inadvertently pulls a Buddha statue on his head, his karma fully earned.

    21. Kat Jennings and the Jaws of Death ( Final Destination 2 )

    Nervous wreck Kat Jennings ( Keegan Connor Tracy ) gets one of the better sudden deaths in the series, largely because Death puts all the pieces in place for a symphony of chaos and then sets it off suddenly. Kat initially survives the car crash, avoiding the pointy pipe that ran through her back window and continues to stick out behind her head. When firefighters use the jaws of life to pry open her car door, however, the impact is enough to set off the airbags, slamming Kat&#8217, s head into the spike and setting off more carnage.

    20. Lewis Romero Loses Weight in the Gym ( Final Destination 3 )

    A lot of the kills on this list are preceded by a character declaring their immortality, but few do it with as much apblomb as Final Destination 3&#8216, s aggro jock Lewis Romero ( Texas Battle ). Like many Lewis responds to Death&#8217, s machinations by asserting his own free will&#8230, loudly. At the end, he does it while pumping iron in the gym, and his protestations shake the walls, knocking free swords used as part of his team &#8217, s decor. The swords cut the bands of his machine as they fall, freeing the weights to smash his head. Given that it was his actions that made the swords drop, Lewis did kind of control his own fate.

    19. Nora Carpenter and the Creepy Hook Hand ( Final Destination 2 )

    Of all the kills on this list, the death of nervous mom Nora Carpenter ( Lynda Boyd ) seems the easiest to avoid. Well, at first anyway, when she rushes into an elevator and gets her hair caught on a hook, part of the prosthetic limbs that a creepy guy holds in a box. If Nora just settled down for a moment, or if the creepy guy would put as much effort into untangling her as he does smelling her hair, then she probably could have wrestled free before the elevator decapitated her. All that aside, it &#8217, s a pretty amazing and gory kill, one that has enough shock value to overcome any logistical leaps.

    18. Erin Ulmer Gets Nailed in the Head ( Final Destination 3 )

    The Final Destination movies are big on dying, but not so big on suffering, which is a good thing. We don&#8217, t want to think of these people as human beings, because that would ruin the fun of watching them go out. Erin Ulmer&#8217, s ( Alexz Johnson ) end in Final Destination 3 veers a bit too much toward suffering, as the camera holds on her as she moans in her last moments. Up until that point, though, the scene has fun with misdirection, making us think that we&#8217, re about to see Ian McKinley get crushed by boards until Erin gets knocked into a nail gun, which perforates the back of her head.

    17. Jonathan Groves Takes a Bath ( The Final Destination )

    On one hand, Jonathan Groves ( Jackson Walker ) feels like he was added to The Final Destination late in production because the producers found out the movie&#8217, s running a bit too short. Groves does show up in the opening crash scene, but we lose track of him and assume he&#8217, s dead until Nick sees him on the news. But we can forgive the shoehorning for the purely absurd way that Groves goes out, with an overfilled bathtub from the hospital floor above crashing down onto his bed.

    16. Nathan Sears and Flight 180&#8217, s Landing ( Final Destination 5 )

    In addition to its fantastic kills Final Destination 5 also has the most well-rounded characters in the series, characters like junior executive Nathan Sears ( Arlen Escarpeta ). Nathan is fundamentally a nice guy but he gets caught up in a dispute with an older union leader, a dispute that ends when the leader accidentally dies during a fight. Thinking that was Death coming for him, Nathan comes to the leader &#8217, s wake to pay respects, secure in the belief that Death has skipped him. That assumption adds some pathos to the moment with gear from Flight 180 falls from the sky and crushes him, taking both good people and bad people.

    15. Frankie Cheeks Trapped in the Drive Thru ( Final Destination 3 )

    Frankie Cheeks ( Sam Easton ) is one of the most unlikable characters in the franchise ( which is saying something ) and we don&#8217, t even know that he&#8217, s dead until after it happens. So why does it rank relatively high on this list? Because of the way it &#8217, s set up, looking very much like protagonists Wendy and Kevin are going to get killed in an unbelievable but well-orchestrated drive-through accident. While our heroes escape in time, a collision still occurs, sending a huge engine fan into the back of Frankie&#8217, s head. At first it seems like the duo passed their death onto an innocent bystander until we see a bloody necklace in the shape of a naked lady, and we all breathe a sigh of relief that Frankie Cheeks walks the Earth no more.

    14. Tim Carpenter Gets Squished By Glass ( Final Destination 2 )

    Tim Carpenter may be the weirdest character in the entire series. The script says he&#8217, s 15, and actor James Kirk sometimes plays him as a teen and sometimes as an eight-year-old, which ends up feeling like he&#8217, s the MadTV character Stuart. That childlike nature leads to Tim&#8217, s end when, like a dumb kid, he just decides to chase after some pigeons because&#8230, they were there? The pigeons take flight, knocking a giant pane of glass off of a crane and sending the glass on top of Tim, smooshing the little weirdo.

    The biggest problem with The Final Destination is its reliance on CG blood, a scourge of 2000s horror. Still, sometimes the kills are so outrageous that we can forgive the poor effects. Such is the case when mechanic Andy Kewzer ( Andrew Fiscella ) gets blown into a chain link fence. It looks silly when his body collapses into goopy chunks, but the setup is satisfying, as is the sight of him getting blasted out of his garage into the instrument of his doom.

    12. Terry Chaney Hit By a Silent Bus ( Final Destination )

    For the first viewers of Final Destination, Terry Chaney ( Amanda Detmer ) had the standout death. Freaked out by Alex&#8217, s talk of Death coming for them all, Terry tells her friends to drop dead, steps into the street and gets splattered by a bus. It&#8217, s a funny moment, as long as you don&#8217, t think about it for a second ( none of her friends have peripheral vision? The bus driver does n&#8217, t see the gesticulating lady backing into the street? ), and it got cheers in the theater. Over time, however, the sudden shock death has become a series trope, dulling the impact ( pun intended ) of Terry &#8217, s end.

    11. Howard Campbell Gets a Trim ( Final Destination Bloodlines )

    Patriarch Howard Campbell ( Alex Zahara ) gets the first classic-style death in Bloodlines, and what a glorious one it is. Occurring after the film has clearly laid out Death&#8217, s rules and process, the filmmakers luxuriate in the setup, taking time to highlight all of the things that could kill someone in Campbell&#8217, s well-appointed suburban backyard: a rake under a ripping trampoline, a shard of glass in an iced drink, a hose about to explode. After several minutes of anticipation, all of those things come together to set-off something we never saw coming, an electric self-propelled lawnmower, which runs over the face of the prone Howard.

    10. Billy Hitchcock Loses His Cool, Also His Head ( Final Destination )

    Iconic as it may be, Terry &#8217, s is n&#8217, t the best sudden shock death in the first Final Destination movie. That honor belongs to New York Rangers superfan Billy Hitchcock ( Seann William Scott ), who also dies without much obvious setup from Death. Billy goes after he and Alex confront the ever-jerky Carter, who decides to defy Death by parking on train tracks. Carter survives, but Billy can&#8217, t take it and starts having an angry meltdown, a meltdown cut short when the train kicks up a piece of shrapnel and sends it flying through Billy &#8217, s neck.

    9. Valerie Lewton Learns About Kitchen Safety ( Final Destination )

    Tod may be the first death in the Final Destination series, but Valerie Lewton ( Kristen Cloke ) gets the first great death of the franchise. Still shaken up over the explosion of Flight 180, teacher Mrs. Lewton spills some alcohol on the ground while making dinner. When her cooking goes awry, the alcohol ignites, setting her house ablaze. But it &#8217, s not the fire that kills her. Rather she dies when she accidentally pulls a knife down from the counter, which embeds itself in her chest.

    8. Evan Lewis Slips on Spaghetti ( Final Destination 2 )

    Sometimes Death orchestrates events in such an improbable manner that we can almost see a physical hand onscreen, manipulating events. Sometimes dumb people do dumb things and pay for it. It&#8217, s the latter event that brings down lottery-winning bro Evan Lewis ( David Paetkau ) in Final Destination 2, who just tosses a pot of spaghetti out the window. That decision proves disastrous when Death&#8217, s meddling leads to a fire in Evan&#8217, s apartment. Evan climbs out to make an escape, but he slips on his own spaghetti, which leaves him vulnerable to the falling ladder that pierces his eye.

    7. Brian Gibbons BBQ Bomb ( Final Destination 2 )

    Although it &#8217, s a sudden kill with little setup, the death of Brian Gibbons ( Noel Fisher ) ranks so high because of how funny it is. At the end of the movie, survivors Kimberly Corman ( A. J. Cook ) and Thomas Burke ( Michael Landes ) join the Gibbons family at a BBQ where they all let off a bit of steam. No sooner does Brian joke about his and his father &#8217, s near-death experience than the grill he&#8217, s using explodes, sending his severed arm flying through the air. The arm lands on his mother &#8217, s plate, a darkly funny beat that makes it one step better than the average out-of-nowhere kills in the series.

    6. Erik and Bobby Campbell Bond in the Hospital ( Final Destination Bloodlines )

    Erik Campbell ( Richard Harmon ) is truly a unique character in the Final Destination franchise. First of all, he seems to survive his own elaborate death, a hilarious incident in a tattoo parlor ( featured heavily in teasers ). Secondly he and his brother Bobby ( Owen Patrick Joyner ) actually like each other, which makes their end so poignant.

    Off of Bludworth&#8217, s information, Erik decides to send the highly allergic Bobby into anaphylaxis so he can revive him, thus satisfying Death. But Erik gets too cute with his plan, and his action accidentally turns on and revs up an MRI machine in the room where the brothers are working. The intensified magnification first pulls in and crushes Erik, with his piercings in front and a wheelchair in back, and then snags a coil from a vending machine, sending it through Bobby&#8217, s head.

    5. Olivia Castle&#8217, s Laser-Guided Fall ( Final Destination 5 )

    Okay, technically Olivia Castle ( Jacqueline MacInnes Wood ) dies when she falls out of a window. But that &#8217, s not the part that sticks out in our mind. Instead we remember everything before that moment when Olivia gets laser eye surgery. As if torn from the worst thoughts of anyone about to get the surgery, we watch as Death shorts out the laser while the tech is out of the room and starts burning out Kimberly &#8217, s eye. No sooner does she escape than she slips on her beloved teddy bear and falls through the window, a somehow merciful end to the suffering.

    3. Ashley Freund &amp, Ashlyn Halperin&#8217, s Tanning Session Gone Wrong ( Final Destination 3 )

    As this list shows, great Final Destination deaths fall into one of three categories: memorably mean, patently absurd, or impeccably designed. Ashley Fruend ( Chelan Simmons ) and Ashlyn Halperin ( Crystal Lowe ) are the prime examples of the first category. A pair of stock mean mall girls, Ashley and Ashlyn go to their favorite tanning spa, giant-size sodas in hand. Death ups the condensation on the drinks, which creates enough water to short out the beds, which turns up the heat, while a fallen shelf keeps them trapped inside. The sight of them burning alive is nasty enough, but the real kicker is the match cut at the end, which replaces two tanning beds with two coffins.

    3. Julia Campbell Takes Out the Trash ( Final Destination Bloodlines )

    Final Destination movies love a good fake-out and Bloodlines has the best one yet. Armed with knowledge from Iris, Stefani walks down a suburban street with a skeptical Erik, Death&#8217, s next probable victim. As the two walk, Stefani points out all of the things that could kill him: leaves from a blower, a soccer ball kicked by kids, a trash compactor. But to Erik&#8217, s mocking glee, nothing happens. Nothing, that is, until Erik&#8217, s sister Julia ( Anna Lore ) goes for a run. In the background. And out of focus, all of those things come together to knock Julia into a roadside dumpster, which is then emptied into the garbage truck where Julia is compacted while Stefani watches.

    2. Hunt Wynorski&#8217, s Guts in a Pool Pump ( The Final Destination )

    The best patently absurd kill in the entire franchise occurs to obnoxious bro Hunt Wynorski ( Nick Zano ). After getting into an altercation with a little kid at a public pool, Hunt sits down to catch some rays when he hears his lucky coin fall into the water. Hunt dives in after it, just as Death starts messing with the equipment, causing the pump to malfunction and raise the pressure. The pump traps Hunt at the bottom and he gestures wildly for help, but no one sees him. Instead of drowning, Hunt gets his guts sucked out through his butt, a kill so wonderful that we don&#8217, t even care about the CGI viscera that caps off the scene.

    1. Candace Hooper Does n&#8217, t Stick the Landing ( Final Destination 5 )

    Easily the most glorious and well-composed kill of the entire franchise occurs early in Final Destination 5, when a standard routine for gymnast Candice Hooper ( Ellen Wroe ) goes horribly wrong. Director Steven Quale takes the time to show viewers the tools and space in which Death works, highlighting dripping water, a shaking girder, spilled dust, and other elements, before bringing them together as Candice goes through her flips. As a result, we understand every step in the system of catastrophes that leads to a ghastly end, with Candice&#8217, s crumpled body shuttering on the gym floor.

    The post Final Destination Kills Ranked from the Short and Sweet to Spectacularly Brutal appeared first on Den of Geek.

  • Final Destination Kills Ranked from the Short and Sweet to Spectacularly Brutal

    Final Destination Kills Ranked from the Short and Sweet to Spectacularly Brutal

    This article contains full spoilers for every Final Destination movie, INCLUDING Bloodlines. For more than a decade, we thought we’d finally made it. It’s been 14 years since the last Final Destination film, the last time Death started killing off those who escaped its plan in exceedingly gruesome fashion. We thought we were free to […]

    The post Final Destination Kills Ranked from the Short and Sweet to Spectacularly Brutal appeared first on Den of Geek.

    This article contains full spoilers for every Final Destination movie, INCLUDING Bloodlines.

    For more than a decade, we thought we’d finally made it. It’s been 14 years since the last Final Destination film, the last time Death started killing off those who escaped its plan in exceedingly gruesome fashion. We thought we were free to go to theaters in safety once more. But as the mortician William Bludworth, played by the late great Tony Todd, has taught us, there’s no escaping Death.

    The franchise is back with one of its best entries: Final Destination Bloodlines, written and directed by newcomers to the franchise Zach Lipovsky and Adam Stein. Bloodlines has a shinier look and a different approach, focusing on a family instead a group of random teens. But it follows the well-established principles of a Final Destination movie, especially in its incredible kills.

    In celebration of Bloodlines bringing Final Destination back to screens, we’re ranking all of Death’s achievements across the franchise. Because Final Destination movies are ultimately about good, gory fun, we’re ranking them from the most boring to the most enjoyably incredible.

    Like Death itself, we do have a few rules here. We aren’t counting any deaths in the premonitions that open each movie, nor the mass casualties that occur in the actual events, which means that you won’t see the infamous pile-up from Final Destination 2 or the incredible tower sequence that opens Bloodlines. Also we’re focusing on Death’s kills, so kills done by human beings don’t count. Even with those restrictions, Final Destination gives us plenty of memorable kills, as Death always makes a show of getting even.

    40. Alex Browning’s Off-Screen Demise (Final Destination 2)

    Is it a mark of respect that the first movie’s protagonist Alex Browning (Devon Sawa) doesn’t die on screen? Or is it the ultimate insult that we learn via newspaper clipping in Final Destination 2 that he was knocked in the head with a brick? Interpretations may vary, but no one can disagree that Alex’s death deserves the bottom spot.

    39. Dennis Lapman Gets a Wrenching Headache (Final Destination 5)

    Played by comedy great David Koechner, paper plant boss Dennis Lapman of Final Destination 5 has one of the gnarliest premonition deaths. Dangling off a collapsing bridge, Dennis almost pulls himself back up when he’s doused with hot tar, burning alive as he lets go and drops to the water. That incredible end makes his actual expiration all the worse, as he goes out when a loose wrench on a shop floor gets hurled into his head, no real setup involved.

    38. Wendy Cristensen, Julie Cristensen, and Kevin Fischer Crash Off-Screen (Final Destination 3)

    With the exception of the original Final Destination, the protagonists end their films thinking they’ve beaten Death only to realize that the Grim Reaper has one more trick up his sleeve, and the movies end with shocking cuts. The worst of them comes in Final Destination 3, one of the weaker entries overall, in which Wendy Cristensen (Mary Elizabeth Winstead), her sister Julie (Amanda Crew), and pal Kevin Fischer (Ryan Merriman) all perish in a train crash.

    Technically we see them meet their end in impressive carnage, but that all happens in a premonition, which this list rules out. So we have to go with the death that happens onscreen—well, on soundtrack, as the movie cuts to black with the sound of the crash.

    37. Janet Cunningham, Lori Milligan, Nick O’Bannon Death By X-Ray Truck (The Final Destination)

    Easily the worst of the series, the fourth entry The Final Destination also ends with a sudden attack on the protagonists. In this case, Nick O’Bannon (Bobby Campo), his love interest Lori Milligan (Shantel VanSanten), and her friend Janet Cunningham (Haley Webb) meet in a coffee shop to celebrate life, only for a truck to crash into the building. It’s a lot like the third movie’s ending, but at least this movie gives us neat x-rays to look at and imagine what horrible things happened to our heroes.

    cnx.cmd.push(function() {
    cnx({
    playerId: “106e33c0-3911-473c-b599-b1426db57530”,

    }).render(“0270c398a82f44f49c23c16122516796”);
    });

    36. George Lanter and the Very Quiet Ambulance (The Final Destination)

    Played by the great Mykelti Williamson, George Lantner is the only character who acts like a human being in The Final Destination. So it’s a bit lame that the movie kills him off with a gag when he steps onto the road and gets flattened by an oncoming ambulance. He mentions “deja vu” right before it happens because his end is a callback to a similar one from the first film, which will be talked about shortly. It’s an unimaginative death and a mean joke at the expense of a likable character, which lands it toward the bottom of the list.

    35. Nadia Monroy Makes Nick’s Dream a Reality (The Final Destination)

    For the most part, this list is ignoring both the premonitions and the mass casualties that occur after a premonition. The one exception comes with Nadia Monroy (Stephanie Honoré) of The Final Destination, who dies in the immediate aftermath of a premonition. After Nick has a vision of a massive Nascar wreck, he panics, which gets a group of people kicked out of the race just as the accident begins. As the survivors try to make sense of what happened, a tire flies out of the stadium and through Nadia’s head, replicating her death from the vision.

    34. Perry Malinowski Salutes the Flag (Final Destination 3)

    Final Destination loves its out-of-nowhere surprise kills. A character thinks they’re safe, they make some ironic statement and, bam, they’re immediately dead. Usually, these kills aren’t nearly as funny or clever as the movies think they are, especially compared to the elaborate sequences that have become the franchise’s calling card. One of the worst comes when Perry Malinowski (Maggie Ma) gets unceremoniously offed when a loose horse breaks of a flagpole that goes through her chest, a forgettable death for a forgettable character. Horse looks cool though.

    33. Darlene Campbell Stays at the Cabin (Final Destination Bloodlines)

    Although not as meta as, say, a Scream movie, the characters in Final Destination: Bloodlines know how Final Destination movies work. To the filmamkers’ credit, the knowledge adds tension to the movie, underscoring how knowledge doesn’t give them power to evade Death. Nowhere is that more clear than at the climax of Bloodlines when Darlene Campbell (Rya Kihlstedt)—a mother who has estranged herself from her children—decides to hide in her own mother’s bunker, thereby stalling Death’s hit list and saving her children. Noble though the sentiment may be, Darlene’s proclamation of love for her children distracts her, and she gets smashed by a falling pole, rendering her heroism moot.

    32. Carter Horton Finally Sees the Sign (Final Destination)

    Played by Kerr Smith, Carter Horton is the onscreen antagonist of the first film, an annoying preppie who bullies Alex and the others and somehow gets to survive. So while we don’t actually see Carter get killed before the screen cuts to closing credits, his demise does rank above those from the third and fourth movies just because we wanted to see this guy get it for so long.

    31. Samantha Lane Has Her Eye on a Stone (The Final Destination)

    The overwhelming majority of Final Destination victims are obnoxious, good-looking teens who mostly deserve to die. Wife and mother Samantha Lane (Krista Lane) certainly isn’t a saint but she doesn’t irritate us like every other jerk in The Final Destination. So we’re a bit annoyed that she gets such a cruel death when a lawn mower kicks up a rock that flies through her eyes while her young kids watch in horror. The kill does get a few extra points, however, for all of the playfulness before it actually happens, as Death sets up a few options to off Sarah before finally picking the rock.

    30. Ian McKinley Splits the Fair (Final Destination 3)

    The franchise has never done great with its human antagonists, the regular guys who get tired of all the dying and take things into their own hands by killing the other characters. Ian McKinley (Kris Lemche) stands out a little bit more than the others. Instead of showing all the things that could off him, the camera simply follows Ian through a crowd while he rants about his immortality. That’s a bit dull, but it pays off when a firework shoots by him, apparently sparing him, only for the explosion to knock over a cherry picker that splits him in half. That extra beat is enough to make his sudden surprise kill a bit more satisfying.

    29. Stefani and Charlie Reyes in a Logjam (Final Destination Bloodlines)

    Although a bit glossier and a bit kinder with its characters, Final Destination Bloodlines follows the beats of most entries in the franchise. In fact, its final moment, in which protagonists Stefani (Kaitlyn Santa Juana) and Charlie Reyes (Teo Briones) realize that they did not, in fact, stop Death and are about to die, feels like a callback to the infamous log premonition in Final Destination 2. However, Bloodlines ups the stakes with a lucky penny leading to a train derailment. The amazing shot of Stefani and Charlie goes bigger than any of the other movies’ shock ending, undone some by the cheap effects when two logs from the train car come loose and flatten our heroes.

    28. Sam Lawton and Emma Bell Die in a Callback (Final Destination 5)

    Final Destination 5 has the best ending of the series, in which protagonists Sam Lawton (Nicholas D’Agosto) and Emma Bell (Molly Harper) survive the ordeal and board a plane to celebrate. It’s only then that we realize that the movie has taken place in 2000 and that they’re boarding Flight 180, the one that explodes at the start of the first movie. Thus we have to watch as the characters who have gone through so much die, but we also get to see the original disaster that started it all. Emily splatters when she gets sucked out of the plane and sliced by the wing, but Sam’s death isn’t that spectacular outside of the fact that he burns up in the same manner as Alex did in his vision.

    27. Tod Waggner Hung Out to Dry (Final Destination)

    The first “real” death of the series, Tod Waggner’s (Chad E. Donella) end feels like a first draft to the spectacular kills to come. When water leaks from a toilet, Todd slips into the tub and gets a laundry cord wrapped around his neck. Todd’s desperate attempts to stand up and save himself, frustrated by the slick tub floor, give the death a level of pathos rarely seen in the series, but outside of that, it’s a fairly rote kill for the overall franchise.

    26. Iris Campbell Gets to the Point (Final Destination Bloodlines)

    Bloodlines gives Tony Todd a glorious final scene as Bloodworth, but it’s the elderly Iris Campbell (Gabrielle Rose) who tells her granddaughter Stefani the rules of Death’s design. Throughout the exposition dump, the camera points to various classic setups, but Iris catches them all. So when Death does finally take her, using a flying fire extinguisher to send a weathervane point through her face, it’s because Iris wants to show Stefani how Death operates. That intentionality makes Iris’ end stand out, even if it isn’t the most elaborate on this list.

    25. Rory Peters Goes Fencing (Final Destination 2)

    Final Destination 2 has the best premonition in the series, an incredible accident and pile-up filled with ghastly incidents. Toward the climax of the movie, that road destruction gets sort of recreated when a series of events launched by a car crash suddenly kill off other characters. It’s mostly fun, and wide shots let us see Death’s composition, but it’s hard to get too excited when stoner Rory Peters (Jonathan Cherry) gets split into thirds by flying fencing.

    24. Clear Rivers and Eugene Dix Go Up in Flames (Final Destination 2)

    It was a nice reveal to show Clear Rivers (Ali Larter) had survived even the post-credit carnage of the first Final Destination to provide information to the victims of the second film. But that surprise was completely undercut by the film then killing Clear in a sudden hospital explosion, taking teacher Eugene (T.C. Carson), one of the more compelling characters in the movie, out along with her. Multi-victim kills always feel like a bit of a cheat, but at least this one had a nice build-up.

    23. Carter Daniels’ Hate Crime Backfires (The Final Destination)

    The Final Destination‘s unlikable cast goes to the extreme when white supremacist Carter (Justin Welborn) singles out George Latner as the cause of his wife’s demise. So it’s especially satisfying when Carter, in the midst of burning a cross on George’s lawn, gets dragged behind his truck and burned alive. Carter may not get the most creative of kills, but rarely do we see such an awful person get their full and just reward like that.

    22. Isaac Palmer Meets the Buddha (Final Destination 5)

    Unlike most entries, Final Destination 5 limited its nastiness to one character, and even then, actor P. J. Byrne knows how to find light notes in his depiction of smarmy exec Isaac Palmer. Byrne sleezes it up as Isaac steals a spa coupon from recently-deceased co-worker, leers at spa workers, and then condescend to the worker who performs upon him. From then on, it’s a classic Final Destination sequence, as a fallen candle ignites spilled oil to send Isaac pin-first onto the ground, crawling away until he inadvertently pulls a Buddha statue on his head, his karma fully earned.

    21. Kat Jennings and the Jaws of Death (Final Destination 2)

    Nervous wreck Kat Jennings (Keegan Connor Tracy) gets one of the better sudden deaths in the series, largely because Death puts all the pieces in place for a symphony of chaos and then sets it off suddenly. Kat initially survives the car crash, avoiding the pointy pipe that ran through her back window and continues to stick out behind her head. When firefighters use the jaws of life to pry open her car door, however, the impact is enough to set off the airbags, slamming Kat’s head into the spike and setting off more carnage.

    20. Lewis Romero Loses Weight in the Gym (Final Destination 3)

    A lot of the kills on this list are preceded by a character declaring their immortality, but few do it with as much apblomb as Final Destination 3‘s aggro jock Lewis Romero (Texas Battle). Like many Lewis responds to Death’s machinations by asserting his own free will… loudly. At the end, he does it while pumping iron in the gym, and his protestations shake the walls, knocking free swords used as part of his team’s decor. The swords cut the bands of his machine as they fall, freeing the weights to smash his head. Given that it was his actions that made the swords drop, Lewis did kind of control his own fate.

    19. Nora Carpenter and the Creepy Hook Hand (Final Destination 2)

    Of all the kills on this list, the death of nervous mom Nora Carpenter (Lynda Boyd) seems the easiest to avoid. Well, at first anyway, when she rushes into an elevator and gets her hair caught on a hook, part of the prosthetic limbs that a creepy guy holds in a box. If Nora just settled down for a moment, or if the creepy guy would put as much effort into untangling her as he does smelling her hair, then she probably could have wrestled free before the elevator decapitated her. All that aside, it’s a pretty amazing and gory kill, one that has enough shock value to overcome any logistical leaps.

    18. Erin Ulmer Gets Nailed in the Head (Final Destination 3)

    The Final Destination movies are big on dying, but not so big on suffering, which is a good thing. We don’t want to think of these people as human beings, because that would ruin the fun of watching them go out. Erin Ulmer’s (Alexz Johnson) end in Final Destination 3 veers a bit too much toward suffering, as the camera holds on her as she moans in her last moments. Up until that point, though, the scene has fun with misdirection, making us think that we’re about to see Ian McKinley get crushed by boards until Erin gets knocked into a nail gun, which perforates the back of her head.

    17. Jonathan Groves Takes a Bath (The Final Destination)

    On one hand, Jonathan Groves (Jackson Walker) feels like he was added to The Final Destination late in production because the producers found out the movie’s running a bit too short. Groves does show up in the opening crash scene, but we lose track of him and assume he’s dead until Nick sees him on the news. But we can forgive the shoehorning for the purely absurd way that Groves goes out, with an overfilled bathtub from the hospital floor above crashing down onto his bed.

    16. Nathan Sears and Flight 180’s Landing (Final Destination 5)

    In addition to its fantastic kills Final Destination 5 also has the most well-rounded characters in the series, characters like junior executive Nathan Sears (Arlen Escarpeta). Nathan is fundamentally a nice guy but he gets caught up in a dispute with an older union leader, a dispute that ends when the leader accidentally dies during a fight. Thinking that was Death coming for him, Nathan comes to the leader’s wake to pay respects, secure in the belief that Death has skipped him. That assumption adds some pathos to the moment with gear from Flight 180 falls from the sky and crushes him, taking both good people and bad people.

    15. Frankie Cheeks Trapped in the Drive Thru (Final Destination 3)

    Frankie Cheeks (Sam Easton) is one of the most unlikable characters in the franchise (which is saying something) and we don’t even know that he’s dead until after it happens. So why does it rank relatively high on this list? Because of the way it’s set up, looking very much like protagonists Wendy and Kevin are going to get killed in an unbelievable but well-orchestrated drive-through accident. While our heroes escape in time, a collision still occurs, sending a huge engine fan into the back of Frankie’s head. At first it seems like the duo passed their death onto an innocent bystander until we see a bloody necklace in the shape of a naked lady, and we all breathe a sigh of relief that Frankie Cheeks walks the Earth no more.

    14. Tim Carpenter Gets Squished By Glass (Final Destination 2)

    Tim Carpenter may be the weirdest character in the entire series. The script says he’s 15, and actor James Kirk sometimes plays him as a teen and sometimes as an eight-year-old, which ends up feeling like he’s the MadTV character Stuart. That childlike nature leads to Tim’s end when, like a dumb kid, he just decides to chase after some pigeons because… they were there? The pigeons take flight, knocking a giant pane of glass off of a crane and sending the glass on top of Tim, smooshing the little weirdo.

    The biggest problem with The Final Destination is its reliance on CG blood, a scourge of 2000s horror. Still, sometimes the kills are so outrageous that we can forgive the poor effects. Such is the case when mechanic Andy Kewzer (Andrew Fiscella) gets blown into a chain link fence. It looks silly when his body collapses into goopy chunks, but the setup is satisfying, as is the sight of him getting blasted out of his garage into the instrument of his doom.

    12. Terry Chaney Hit By a Silent Bus (Final Destination)

    For the first viewers of Final Destination, Terry Chaney (Amanda Detmer) had the standout death. Freaked out by Alex’s talk of Death coming for them all, Terry tells her friends to drop dead, steps into the street and gets splattered by a bus. It’s a funny moment, as long as you don’t think about it for a second (none of her friends have peripheral vision? The bus driver doesn’t see the gesticulating lady backing into the street?), and it got cheers in the theater. Over time, however, the sudden shock death has become a series trope, dulling the impact (pun intended) of Terry’s end.

    11. Howard Campbell Gets a Trim (Final Destination Bloodlines)

    Patriarch Howard Campbell (Alex Zahara) gets the first classic-style death in Bloodlines, and what a glorious one it is. Occurring after the film has clearly laid out Death’s rules and process, the filmmakers luxuriate in the setup, taking time to highlight all of the things that could kill someone in Campbell’s well-appointed suburban backyard: a rake under a ripping trampoline, a shard of glass in an iced drink, a hose about to explode. After several minutes of anticipation, all of those things come together to set-off something we never saw coming, an electric self-propelled lawnmower, which runs over the face of the prone Howard.

    10. Billy Hitchcock Loses His Cool, Also His Head (Final Destination)

    Iconic as it may be, Terry’s isn’t the best sudden shock death in the first Final Destination movie. That honor belongs to New York Rangers superfan Billy Hitchcock (Seann William Scott), who also dies without much obvious setup from Death. Billy goes after he and Alex confront the ever-jerky Carter, who decides to defy Death by parking on train tracks. Carter survives, but Billy can’t take it and starts having an angry meltdown, a meltdown cut short when the train kicks up a piece of shrapnel and sends it flying through Billy’s neck.

    9. Valerie Lewton Learns About Kitchen Safety (Final Destination)

    Tod may be the first death in the Final Destination series, but Valerie Lewton (Kristen Cloke) gets the first great death of the franchise. Still shaken up over the explosion of Flight 180, teacher Mrs. Lewton spills some alcohol on the ground while making dinner. When her cooking goes awry, the alcohol ignites, setting her house ablaze. But it’s not the fire that kills her. Rather she dies when she accidentally pulls a knife down from the counter, which embeds itself in her chest.

    8. Evan Lewis Slips on Spaghetti (Final Destination 2)

    Sometimes Death orchestrates events in such an improbable manner that we can almost see a physical hand onscreen, manipulating events. Sometimes dumb people do dumb things and pay for it. It’s the latter event that brings down lottery-winning bro Evan Lewis (David Paetkau) in Final Destination 2, who just tosses a pot of spaghetti out the window. That decision proves disastrous when Death’s meddling leads to a fire in Evan’s apartment. Evan climbs out to make an escape, but he slips on his own spaghetti, which leaves him vulnerable to the falling ladder that pierces his eye.

    7. Brian Gibbons BBQ Bomb (Final Destination 2)

    Although it’s a sudden kill with little setup, the death of Brian Gibbons (Noel Fisher) ranks so high because of how funny it is. At the end of the movie, survivors Kimberly Corman (A.J. Cook) and Thomas Burke (Michael Landes) join the Gibbons family at a BBQ where they all let off a bit of steam. No sooner does Brian joke about his and his father’s near-death experience than the grill he’s using explodes, sending his severed arm flying through the air. The arm lands on his mother’s plate, a darkly funny beat that makes it one step better than the average out-of-nowhere kills in the series.

    6. Erik and Bobby Campbell Bond in the Hospital (Final Destination Bloodlines)

    Erik Campbell (Richard Harmon) is truly a unique character in the Final Destination franchise. First of all, he seems to survive his own elaborate death, a hilarious incident in a tattoo parlor (featured heavily in teasers). Secondly he and his brother Bobby (Owen Patrick Joyner) actually like each other, which makes their end so poignant.

    Off of Bludworth’s information, Erik decides to send the highly allergic Bobby into anaphylaxis so he can revive him, thus satisfying Death. But Erik gets too cute with his plan, and his action accidentally turns on and revs up an MRI machine in the room where the brothers are working. The intensified magnification first pulls in and crushes Erik, with his piercings in front and a wheelchair in back, and then snags a coil from a vending machine, sending it through Bobby’s head.

    5. Olivia Castle’s Laser-Guided Fall (Final Destination 5)

    Okay, technically Olivia Castle (Jacqueline MacInnes Wood) dies when she falls out of a window. But that’s not the part that sticks out in our mind. Instead we remember everything before that moment when Olivia gets laser eye surgery. As if torn from the worst thoughts of anyone about to get the surgery, we watch as Death shorts out the laser while the tech is out of the room and starts burning out Kimberly’s eye. No sooner does she escape than she slips on her beloved teddy bear and falls through the window, a somehow merciful end to the suffering.

    3. Ashley Freund & Ashlyn Halperin’s Tanning Session Gone Wrong (Final Destination 3)

    As this list shows, great Final Destination deaths fall into one of three categories: memorably mean, patently absurd, or impeccably designed. Ashley Fruend (Chelan Simmons) and Ashlyn Halperin (Crystal Lowe) are the prime examples of the first category. A pair of stock mean mall girls, Ashley and Ashlyn go to their favorite tanning spa, giant-size sodas in hand. Death ups the condensation on the drinks, which creates enough water to short out the beds, which turns up the heat, while a fallen shelf keeps them trapped inside. The sight of them burning alive is nasty enough, but the real kicker is the match cut at the end, which replaces two tanning beds with two coffins.

    3. Julia Campbell Takes Out the Trash (Final Destination Bloodlines)

    Final Destination movies love a good fake-out and Bloodlines has the best one yet. Armed with knowledge from Iris, Stefani walks down a suburban street with a skeptical Erik, Death’s next probable victim. As the two walk, Stefani points out all of the things that could kill him: leaves from a blower, a soccer ball kicked by kids, a trash compactor. But to Erik’s mocking glee, nothing happens. Nothing, that is, until Erik’s sister Julia (Anna Lore) goes for a run. In the background. And out of focus, all of those things come together to knock Julia into a roadside dumpster, which is then emptied into the garbage truck where Julia is compacted while Stefani watches.

    2. Hunt Wynorski’s Guts in a Pool Pump (The Final Destination)

    The best patently absurd kill in the entire franchise occurs to obnoxious bro Hunt Wynorski (Nick Zano). After getting into an altercation with a little kid at a public pool, Hunt sits down to catch some rays when he hears his lucky coin fall into the water. Hunt dives in after it, just as Death starts messing with the equipment, causing the pump to malfunction and raise the pressure. The pump traps Hunt at the bottom and he gestures wildly for help, but no one sees him. Instead of drowning, Hunt gets his guts sucked out through his butt, a kill so wonderful that we don’t even care about the CGI viscera that caps off the scene.

    1. Candace Hooper Doesn’t Stick the Landing (Final Destination 5)

    Easily the most glorious and well-composed kill of the entire franchise occurs early in Final Destination 5, when a standard routine for gymnast Candice Hooper (Ellen Wroe) goes horribly wrong. Director Steven Quale takes the time to show viewers the tools and space in which Death works, highlighting dripping water, a shaking girder, spilled dust, and other elements, before bringing them together as Candice goes through her flips. As a result, we understand every step in the system of catastrophes that leads to a ghastly end, with Candice’s crumpled body shuttering on the gym floor.

    The post Final Destination Kills Ranked from the Short and Sweet to Spectacularly Brutal appeared first on Den of Geek.

  • That’s Not My Burnout

    That’s Not My Burnout

    Are you like me, reading about people fading away as they burn out, and feeling unable to relate? Do you feel like your feelings are invisible to the world because you’re experiencing burnout differently? When burnout starts to push down on us, our core comes through more. Beautiful, peaceful souls get quieter and fade into that distant and distracted burnout we’ve all read about. But some of us, those with fires always burning on the edges of our core, get hotter. In my heart I am fire. When I face burnout I double down, triple down, burning hotter and hotter to try to best the challenge. I don’t fade—I am engulfed in a zealous burnout

    So what on earth is a zealous burnout?

    Imagine a woman determined to do it all. She has two amazing children whom she, along with her husband who is also working remotely, is homeschooling during a pandemic. She has a demanding client load at work—all of whom she loves. She gets up early to get some movement in (or often catch up on work), does dinner prep as the kids are eating breakfast, and gets to work while positioning herself near “fourth grade” to listen in as she juggles clients, tasks, and budgets. Sound like a lot? Even with a supportive team both at home and at work, it is. 

    Sounds like this woman has too much on her plate and needs self-care. But no, she doesn’t have time for that. In fact, she starts to feel like she’s dropping balls. Not accomplishing enough. There’s not enough of her to be here and there; she is trying to divide her mind in two all the time, all day, every day. She starts to doubt herself. And as those feelings creep in more and more, her internal narrative becomes more and more critical.

    Suddenly she KNOWS what she needs to do! She should DO MORE. 

    This is a hard and dangerous cycle. Know why? Because once she doesn’t finish that new goal, that narrative will get worse. Suddenly she’s failing. She isn’t doing enough. SHE is not enough. She might fail, she might fail her family…so she’ll find more she should do. She doesn’t sleep as much, move as much, all in the efforts to do more. Caught in this cycle of trying to prove herself to herself, never reaching any goal. Never feeling “enough.” 

    So, yeah, that’s what zealous burnout looks like for me. It doesn’t happen overnight in some grand gesture but instead slowly builds over weeks and months. My burning out process looks like speeding up, not a person losing focus. I speed up and up and up…and then I just stop.

    I am the one who could

    It’s funny the things that shape us. Through the lens of childhood, I viewed the fears, struggles, and sacrifices of someone who had to make it all work without having enough. I was lucky that my mother was so resourceful and my father supportive; I never went without and even got an extra here or there. 

    Growing up, I did not feel shame when my mother paid with food stamps; in fact, I’d have likely taken on any debate on the topic, verbally eviscerating anyone who dared to criticize the disabled woman trying to make sure all our needs were met with so little. As a child, I watched the way the fear of not making those ends meet impacted people I love. As the non-disabled person in my home, I would take on many of the physical tasks because I was “the one who could” make our lives a little easier. I learned early to associate fears or uncertainty with putting more of myself into it—I am the one who can. I learned early that when something frightens me, I can double down and work harder to make it better. I can own the challenge. When people have seen this in me as an adult, I’ve been told I seem fearless, but make no mistake, I’m not. If I seem fearless, it’s because this behavior was forged from other people’s fears. 

    And here I am, more than 30 years later still feeling the urge to mindlessly push myself forward when faced with overwhelming tasks ahead of me, assuming that I am the one who can and therefore should. I find myself driven to prove that I can make things happen if I work longer hours, take on more responsibility, and do more

    I do not see people who struggle financially as failures, because I have seen how strong that tide can be—it pulls you along the way. I truly get that I have been privileged to be able to avoid many of the challenges that were present in my youth. That said, I am still “the one who can” who feels she should, so if I were faced with not having enough to make ends meet for my own family, I would see myself as having failed. Though I am supported and educated, most of this is due to good fortune. I will, however, allow myself the arrogance of saying I have been careful with my choices to have encouraged that luck. My identity stems from the idea that I am “the one who can” so therefore feel obligated to do the most. I can choose to stop, and with some quite literal cold water splashed in my face, I’ve made the choice to before. But that choosing to stop is not my go-to; I move forward, driven by a fear that is so a part of me that I barely notice it’s there until I’m feeling utterly worn away.

    So why all the history? You see, burnout is a fickle thing. I have heard and read a lot about burnout over the years. Burnout is real. Especially now, with COVID, many of us are balancing more than we ever have before—all at once! It’s hard, and the procrastinating, the avoidance, the shutting down impacts so many amazing professionals. There are important articles that relate to what I imagine must be the majority of people out there, but not me. That’s not what my burnout looks like.

    The dangerous invisibility of zealous burnout

    A lot of work environments see the extra hours, extra effort, and overall focused commitment as an asset (and sometimes that’s all it is). They see someone trying to rise to challenges, not someone stuck in their fear. Many well-meaning organizations have safeguards in place to protect their teams from burnout. But in cases like this, those alarms are not always tripped, and then when the inevitable stop comes, some members of the organization feel surprised and disappointed. And sometimes maybe even betrayed. 

    Parents—more so mothers, statistically speaking—are praised as being so on top of it all when they can work, be involved in the after-school activities, practice self-care in the form of diet and exercise, and still meet friends for coffee or wine. During COVID many of us have binged countless streaming episodes showing how it’s so hard for the female protagonist, but she is strong and funny and can do it. It’s a “very special episode” when she breaks down, cries in the bathroom, woefully admits she needs help, and just stops for a bit. Truth is, countless people are hiding their tears or are doom-scrolling to escape. We know that the media is a lie to amuse us, but often the perception that it’s what we should strive for has penetrated much of society.

    Women and burnout

    I love men. And though I don’t love every man (heads up, I don’t love every woman or nonbinary person either), I think there is a beautiful spectrum of individuals who represent that particular binary gender. 

    That said, women are still more often at risk of burnout than their male counterparts, especially in these COVID stressed times. Mothers in the workplace feel the pressure to do all the “mom” things while giving 110%. Mothers not in the workplace feel they need to do more to “justify” their lack of traditional employment. Women who are not mothers often feel the need to do even more because they don’t have that extra pressure at home. It’s vicious and systemic and so a part of our culture that we’re often not even aware of the enormity of the pressures we put on ourselves and each other. 

    And there are prices beyond happiness too. Harvard Health Publishing released a study a decade ago that “uncovered strong links between women’s job stress and cardiovascular disease.” The CDC noted, “Heart disease is the leading cause of death for women in the United States, killing 299,578 women in 2017—or about 1 in every 5 female deaths.” 

    This relationship between work stress and health, from what I have read, is more dangerous for women than it is for their non-female counterparts.

    But what if your burnout isn’t like that either?

    That might not be you either. After all, each of us is so different and how we respond to stressors is too. It’s part of what makes us human. Don’t stress what burnout looks like, just learn to recognize it in yourself. Here are a few questions I sometimes ask friends if I am concerned about them.

    Are you happy? This simple question should be the first thing you ask yourself. Chances are, even if you’re burning out doing all the things you love, as you approach burnout you’ll just stop taking as much joy from it all.

    Do you feel empowered to say no? I have observed in myself and others that when someone is burning out, they no longer feel they can say no to things. Even those who don’t “speed up” feel pressure to say yes to not disappoint the people around them.

    What are three things you’ve done for yourself? Another observance is that we all tend to stop doing things for ourselves. Anything from skipping showers and eating poorly to avoiding talking to friends. These can be red flags. 

    Are you making excuses? Many of us try to disregard feelings of burnout. Over and over I have heard, “It’s just crunch time,” “As soon as I do this one thing, it will all be better,” and “Well I should be able to handle this, so I’ll figure it out.” And it might really be crunch time, a single goal, and/or a skill set you need to learn. That happens—life happens. BUT if this doesn’t stop, be honest with yourself. If you’ve worked more 50-hour weeks since January than not, maybe it’s not crunch time—maybe it’s a bad situation that you’re burning out from.

    Do you have a plan to stop feeling this way? If something is truly temporary and you do need to just push through, then it has an exit route with a
    defined end.

    Take the time to listen to yourself as you would a friend. Be honest, allow yourself to be uncomfortable, and break the thought cycles that prevent you from healing. 

    So now what?

    What I just described is a different path to burnout, but it’s still burnout. There are well-established approaches to working through burnout:

    • Get enough sleep.
    • Eat healthy.
    • Work out.
    • Get outside.
    • Take a break.
    • Overall, practice self-care.

    Those are hard for me because they feel like more tasks. If I’m in the burnout cycle, doing any of the above for me feels like a waste. The narrative is that if I’m already failing, why would I take care of myself when I’m dropping all those other balls? People need me, right? 

    If you’re deep in the cycle, your inner voice might be pretty awful by now. If you need to, tell yourself you need to take care of the person your people depend on. If your roles are pushing you toward burnout, use them to help make healing easier by justifying the time spent working on you. 

    To help remind myself of the airline attendant message about putting the mask on yourself first, I have come up with a few things that I do when I start feeling myself going into a zealous burnout.

    Cook an elaborate meal for someone! 

    OK, I am a “food-focused” individual so cooking for someone is always my go-to. There are countless tales in my home of someone walking into the kitchen and turning right around and walking out when they noticed I was “chopping angrily.” But it’s more than that, and you should give it a try. Seriously. It’s the perfect go-to if you don’t feel worthy of taking time for yourself—do it for someone else. Most of us work in a digital world, so cooking can fill all of your senses and force you to be in the moment with all the ways you perceive the world. It can break you out of your head and help you gain a better perspective. In my house, I’ve been known to pick a place on the map and cook food that comes from wherever that is (thank you, Pinterest). I love cooking Indian food, as the smells are warm, the bread needs just enough kneading to keep my hands busy, and the process takes real attention for me because it’s not what I was brought up making. And in the end, we all win!

    Vent like a foul-mouthed fool

    Be careful with this one! 

    I have been making an effort to practice more gratitude over the past few years, and I recognize the true benefits of that. That said, sometimes you just gotta let it all out—even the ugly. Hell, I’m a big fan of not sugarcoating our lives, and that sometimes means that to get past the big pile of poop, you’re gonna wanna complain about it a bit. 

    When that is what’s needed, turn to a trusted friend and allow yourself some pure verbal diarrhea, saying all the things that are bothering you. You need to trust this friend not to judge, to see your pain, and, most importantly, to tell you to remove your cranium from your own rectal cavity. Seriously, it’s about getting a reality check here! One of the things I admire the most about my husband (though often after the fact) is his ability to break things down to their simplest. “We’re spending our lives together, of course you’re going to disappoint me from time to time, so get over it” has been his way of speaking his dedication, love, and acceptance of me—and I could not be more grateful. It also, of course, has meant that I needed to remove my head from that rectal cavity. So, again, usually those moments are appreciated in hindsight.

    Pick up a book! 

    There are many books out there that aren’t so much self-help as they are people just like you sharing their stories and how they’ve come to find greater balance. Maybe you’ll find something that speaks to you. Titles that have stood out to me include:

    • Thrive by Arianna Huffington
    • Tools of Titans by Tim Ferriss
    • Girl, Stop Apologizing by Rachel Hollis
    • Dare to Lead by Brené Brown

    Or, another tactic I love to employ is to read or listen to a book that has NOTHING to do with my work-life balance. I’ve read the following books and found they helped balance me out because my mind was pondering their interesting topics instead of running in circles:

    • The Drunken Botanist by Amy Stewart
    • Superlife by Darin Olien
    • A Brief History of Everyone Who Ever Lived by Adam Rutherford
    • Gaia’s Garden by Toby Hemenway 

    If you’re not into reading, pick up a topic on YouTube or choose a podcast to subscribe to. I’ve watched countless permaculture and gardening topics in addition to how to raise chickens and ducks. For the record, I do not have a particularly large food garden, nor do I own livestock of any kind…yet. I just find the topic interesting, and it has nothing to do with any aspect of my life that needs anything from me.

    Forgive yourself 

    You are never going to be perfect—hell, it would be boring if you were. It’s OK to be broken and flawed. It’s human to be tired and sad and worried. It’s OK to not do it all. It’s scary to be imperfect, but you cannot be brave if nothing were scary.

    This last one is the most important: allow yourself permission to NOT do it all. You never promised to be everything to everyone at all times. We are more powerful than the fears that drive us. 

    This is hard. It is hard for me. It’s what’s driven me to write this—that it’s OK to stop. It’s OK that your unhealthy habit that might even benefit those around you needs to end. You can still be successful in life.

    I recently read that we are all writing our eulogy in how we live. Knowing that your professional accomplishments won’t be mentioned in that speech, what will yours say? What do you want it to say? 

    Look, I get that none of these ideas will “fix it,” and that’s not their purpose. None of us are in control of our surroundings, only how we respond to them. These suggestions are to help stop the spiral effect so that you are empowered to address the underlying issues and choose your response. They are things that work for me most of the time. Maybe they’ll work for you.

    Does this sound familiar? 

    If this sounds familiar, it’s not just you. Don’t let your negative self-talk tell you that you “even burn out wrong.” It’s not wrong. Even if rooted in fear like my own drivers, I believe that this need to do more comes from a place of love, determination, motivation, and other wonderful attributes that make you the amazing person you are. We’re going to be OK, ya know. The lives that unfold before us might never look like that story in our head—that idea of “perfect” or “done” we’re looking for, but that’s OK. Really, when we stop and look around, usually the only eyes that judge us are in the mirror. 

    Do you remember that Winnie the Pooh sketch that had Pooh eat so much at Rabbit’s house that his buttocks couldn’t fit through the door? Well, I already associate a lot with Rabbit, so it came as no surprise when he abruptly declared that this was unacceptable. But do you recall what happened next? He put a shelf across poor Pooh’s ankles and decorations on his back, and made the best of the big butt in his kitchen. 

    At the end of the day we are resourceful and know that we are able to push ourselves if we need to—even when we are tired to our core or have a big butt of fluff ‘n’ stuff in our room. None of us has to be afraid, as we can manage any obstacle put in front of us. And maybe that means we will need to redefine success to allow space for being uncomfortably human, but that doesn’t really sound so bad either. 

    So, wherever you are right now, please breathe. Do what you need to do to get out of your head. Forgive and take care.

  • Asynchronous Design Critique: Giving Feedback

    Asynchronous Design Critique: Giving Feedback

    Feedback, in whichever form it takes, and whatever it may be called, is one of the most effective soft skills that we have at our disposal to collaboratively get our designs to a better place while growing our own skills and perspectives.

    Feedback is also one of the most underestimated tools, and often by assuming that we’re already good at it, we settle, forgetting that it’s a skill that can be trained, grown, and improved. Poor feedback can create confusion in projects, bring down morale, and affect trust and team collaboration over the long term. Quality feedback can be a transformative force. 

    Practicing our skills is surely a good way to improve, but the learning gets even faster when it’s paired with a good foundation that channels and focuses the practice. What are some foundational aspects of giving good feedback? And how can feedback be adjusted for remote and distributed work environments? 

    On the web, we can identify a long tradition of asynchronous feedback: from the early days of open source, code was shared and discussed on mailing lists. Today, developers engage on pull requests, designers comment in their favorite design tools, project managers and scrum masters exchange ideas on tickets, and so on.

    Design critique is often the name used for a type of feedback that’s provided to make our work better, collaboratively. So it shares a lot of the principles with feedback in general, but it also has some differences.

    The content

    The foundation of every good critique is the feedback’s content, so that’s where we need to start. There are many models that you can use to shape your content. The one that I personally like best—because it’s clear and actionable—is this one from Lara Hogan.

    While this equation is generally used to give feedback to people, it also fits really well in a design critique because it ultimately answers some of the core questions that we work on: What? Where? Why? How? Imagine that you’re giving some feedback about some design work that spans multiple screens, like an onboarding flow: there are some pages shown, a flow blueprint, and an outline of the decisions made. You spot something that could be improved. If you keep the three elements of the equation in mind, you’ll have a mental model that can help you be more precise and effective.

    Here is a comment that could be given as a part of some feedback, and it might look reasonable at a first glance: it seems to superficially fulfill the elements in the equation. But does it?

    Not sure about the buttons’ styles and hierarchy—it feels off. Can you change them?

    Observation for design feedback doesn’t just mean pointing out which part of the interface your feedback refers to, but it also refers to offering a perspective that’s as specific as possible. Are you providing the user’s perspective? Your expert perspective? A business perspective? The project manager’s perspective? A first-time user’s perspective?

    When I see these two buttons, I expect one to go forward and one to go back.

    Impact is about the why. Just pointing out a UI element might sometimes be enough if the issue may be obvious, but more often than not, you should add an explanation of what you’re pointing out.

    When I see these two buttons, I expect one to go forward and one to go back. But this is the only screen where this happens, as before we just used a single button and an “×” to close. This seems to be breaking the consistency in the flow.

    The question approach is meant to provide open guidance by eliciting the critical thinking in the designer receiving the feedback. Notably, in Lara’s equation she provides a second approach: request, which instead provides guidance toward a specific solution. While that’s a viable option for feedback in general, for design critiques, in my experience, defaulting to the question approach usually reaches the best solutions because designers are generally more comfortable in being given an open space to explore.

    The difference between the two can be exemplified with, for the question approach:

    When I see these two buttons, I expect one to go forward and one to go back. But this is the only screen where this happens, as before we just used a single button and an “×” to close. This seems to be breaking the consistency in the flow. Would it make sense to unify them?

    Or, for the request approach:

    When I see these two buttons, I expect one to go forward and one to go back. But this is the only screen where this happens, as before we just used a single button and an “×” to close. This seems to be breaking the consistency in the flow. Let’s make sure that all screens have the same pair of forward and back buttons.

    At this point in some situations, it might be useful to integrate with an extra why: why you consider the given suggestion to be better.

    When I see these two buttons, I expect one to go forward and one to go back. But this is the only screen where this happens, as before we just used a single button and an “×” to close. This seems to be breaking the consistency in the flow. Let’s make sure that all screens have the same two forward and back buttons so that users don’t get confused.

    Choosing the question approach or the request approach can also at times be a matter of personal preference. A while ago, I was putting a lot of effort into improving my feedback: I did rounds of anonymous feedback, and I reviewed feedback with other people. After a few rounds of this work and a year later, I got a positive response: my feedback came across as effective and grounded. Until I changed teams. To my shock, my next round of feedback from one specific person wasn’t that great. The reason is that I had previously tried not to be prescriptive in my advice—because the people who I was previously working with preferred the open-ended question format over the request style of suggestions. But now in this other team, there was one person who instead preferred specific guidance. So I adapted my feedback for them to include requests.

    One comment that I heard come up a few times is that this kind of feedback is quite long, and it doesn’t seem very efficient. No… but also yes. Let’s explore both sides.

    No, this style of feedback is actually efficient because the length here is a byproduct of clarity, and spending time giving this kind of feedback can provide exactly enough information for a good fix. Also if we zoom out, it can reduce future back-and-forth conversations and misunderstandings, improving the overall efficiency and effectiveness of collaboration beyond the single comment. Imagine that in the example above the feedback were instead just, “Let’s make sure that all screens have the same two forward and back buttons.” The designer receiving this feedback wouldn’t have much to go by, so they might just apply the change. In later iterations, the interface might change or they might introduce new features—and maybe that change might not make sense anymore. Without the why, the designer might imagine that the change is about consistency… but what if it wasn’t? So there could now be an underlying concern that changing the buttons would be perceived as a regression.

    Yes, this style of feedback is not always efficient because the points in some comments don’t always need to be exhaustive, sometimes because certain changes may be obvious (“The font used doesn’t follow our guidelines”) and sometimes because the team may have a lot of internal knowledge such that some of the whys may be implied.

    So the equation above isn’t meant to suggest a strict template for feedback but a mnemonic to reflect and improve the practice. Even after years of active work on my critiques, I still from time to time go back to this formula and reflect on whether what I just wrote is effective.

    The tone

    Well-grounded content is the foundation of feedback, but that’s not really enough. The soft skills of the person who’s providing the critique can multiply the likelihood that the feedback will be well received and understood. Tone alone can make the difference between content that’s rejected or welcomed, and it’s been demonstrated that only positive feedback creates sustained change in people.

    Since our goal is to be understood and to have a positive working environment, tone is essential to work on. Over the years, I’ve tried to summarize the required soft skills in a formula that mirrors the one for content: the receptivity equation.

    Respectful feedback comes across as grounded, solid, and constructive. It’s the kind of feedback that, whether it’s positive or negative, is perceived as useful and fair.

    Timing refers to when the feedback happens. To-the-point feedback doesn’t have much hope of being well received if it’s given at the wrong time. Questioning the entire high-level information architecture of a new feature when it’s about to ship might still be relevant if that questioning highlights a major blocker that nobody saw, but it’s way more likely that those concerns will have to wait for a later rework. So in general, attune your feedback to the stage of the project. Early iteration? Late iteration? Polishing work in progress? These all have different needs. The right timing will make it more likely that your feedback will be well received.

    Attitude is the equivalent of intent, and in the context of person-to-person feedback, it can be referred to as radical candor. That means checking before we write to see whether what we have in mind will truly help the person and make the project better overall. This might be a hard reflection at times because maybe we don’t want to admit that we don’t really appreciate that person. Hopefully that’s not the case, but that can happen, and that’s okay. Acknowledging and owning that can help you make up for that: how would I write if I really cared about them? How can I avoid being passive aggressive? How can I be more constructive?

    Form is relevant especially in a diverse and cross-cultural work environments because having great content, perfect timing, and the right attitude might not come across if the way that we write creates misunderstandings. There might be many reasons for this: sometimes certain words might trigger specific reactions; sometimes nonnative speakers might not understand all the nuances of some sentences; sometimes our brains might just be different and we might perceive the world differently—neurodiversity must be taken into consideration. Whatever the reason, it’s important to review not just what we write but how.

    A few years back, I was asking for some feedback on how I give feedback. I received some good advice but also a comment that surprised me. They pointed out that when I wrote “Oh, […],” I made them feel stupid. That wasn’t my intent! I felt really bad, and I just realized that I provided feedback to them for months, and every time I might have made them feel stupid. I was horrified… but also thankful. I made a quick fix: I added “oh” in my list of replaced words (your choice between: macOS’s text replacement, aText, TextExpander, or others) so that when I typed “oh,” it was instantly deleted. 

    Something to highlight because it’s quite frequent—especially in teams that have a strong group spirit—is that people tend to beat around the bush. It’s important to remember here that a positive attitude doesn’t mean going light on the feedback—it just means that even when you provide hard, difficult, or challenging feedback, you do so in a way that’s respectful and constructive. The nicest thing that you can do for someone is to help them grow.

    We have a great advantage in giving feedback in written form: it can be reviewed by another person who isn’t directly involved, which can help to reduce or remove any bias that might be there. I found that the best, most insightful moments for me have happened when I’ve shared a comment and I’ve asked someone who I highly trusted, “How does this sound?,” “How can I do it better,” and even “How would you have written it?”—and I’ve learned a lot by seeing the two versions side by side.

    The format

    Asynchronous feedback also has a major inherent advantage: we can take more time to refine what we’ve written to make sure that it fulfills two main goals: the clarity of communication and the actionability of the suggestions.

    Let’s imagine that someone shared a design iteration for a project. You are reviewing it and leaving a comment. There are many ways to do this, and of course context matters, but let’s try to think about some elements that may be useful to consider.

    In terms of clarity, start by grounding the critique that you’re about to give by providing context. Specifically, this means describing where you’re coming from: do you have a deep knowledge of the project, or is this the first time that you’re seeing it? Are you coming from a high-level perspective, or are you figuring out the details? Are there regressions? Which user’s perspective are you taking when providing your feedback? Is the design iteration at a point where it would be okay to ship this, or are there major things that need to be addressed first?

    Providing context is helpful even if you’re sharing feedback within a team that already has some information on the project. And context is absolutely essential when giving cross-team feedback. If I were to review a design that might be indirectly related to my work, and if I had no knowledge about how the project arrived at that point, I would say so, highlighting my take as external.

    We often focus on the negatives, trying to outline all the things that could be done better. That’s of course important, but it’s just as important—if not more—to focus on the positives, especially if you saw progress from the previous iteration. This might seem superfluous, but it’s important to keep in mind that design is a discipline where there are hundreds of possible solutions for every problem. So pointing out that the design solution that was chosen is good and explaining why it’s good has two major benefits: it confirms that the approach taken was solid, and it helps to ground your negative feedback. In the longer term, sharing positive feedback can help prevent regressions on things that are going well because those things will have been highlighted as important. As a bonus, positive feedback can also help reduce impostor syndrome.

    There’s one powerful approach that combines both context and a focus on the positives: frame how the design is better than the status quo (compared to a previous iteration, competitors, or benchmarks) and why, and then on that foundation, you can add what could be improved. This is powerful because there’s a big difference between a critique that’s for a design that’s already in good shape and a critique that’s for a design that isn’t quite there yet.

    Another way that you can improve your feedback is to depersonalize the feedback: the comments should always be about the work, never about the person who made it. It’s “This button isn’t well aligned” versus “You haven’t aligned this button well.” This is very easy to change in your writing by reviewing it just before sending.

    In terms of actionability, one of the best approaches to help the designer who’s reading through your feedback is to split it into bullet points or paragraphs, which are easier to review and analyze one by one. For longer pieces of feedback, you might also consider splitting it into sections or even across multiple comments. Of course, adding screenshots or signifying markers of the specific part of the interface you’re referring to can also be especially useful.

    One approach that I’ve personally used effectively in some contexts is to enhance the bullet points with four markers using emojis. So a red square 🟥 means that it’s something that I consider blocking; a yellow diamond 🔶 is something that I can be convinced otherwise, but it seems to me that it should be changed; and a green circle 🟢 is a detailed, positive confirmation. I also use a blue spiral 🌀 for either something that I’m not sure about, an exploration, an open alternative, or just a note. But I’d use this approach only on teams where I’ve already established a good level of trust because if it happens that I have to deliver a lot of red squares, the impact could be quite demoralizing, and I’d reframe how I’d communicate that a bit.

    Let’s see how this would work by reusing the example that we used earlier as the first bullet point in this list:

    • 🔶 Navigation—When I see these two buttons, I expect one to go forward and one to go back. But this is the only screen where this happens, as before we just used a single button and an “×” to close. This seems to be breaking the consistency in the flow. Let’s make sure that all screens have the same two forward and back buttons so that users don’t get confused.
    • 🟢 Overall—I think the page is solid, and this is good enough to be our release candidate for a version 1.0.
    • 🟢 Metrics—Good improvement in the buttons on the metrics area; the improved contrast and new focus style make them more accessible.
    •  🟥  Button Style—Using the green accent in this context creates the impression that it’s a positive action because green is usually perceived as a confirmation color. Do we need to explore a different color?
    • 🔶Tiles—Given the number of items on the page, and the overall page hierarchy, it seems to me that the tiles shouldn’t be using the Subtitle 1 style but the Subtitle 2 style. This will keep the visual hierarchy more consistent.
    • 🌀 Background—Using a light texture works well, but I wonder whether it adds too much noise in this kind of page. What is the thinking in using that?

    What about giving feedback directly in Figma or another design tool that allows in-place feedback? In general, I find these difficult to use because they hide discussions and they’re harder to track, but in the right context, they can be very effective. Just make sure that each of the comments is separate so that it’s easier to match each discussion to a single task, similar to the idea of splitting mentioned above.

    One final note: say the obvious. Sometimes we might feel that something is obviously good or obviously wrong, and so we don’t say it. Or sometimes we might have a doubt that we don’t express because the question might sound stupid. Say it—that’s okay. You might have to reword it a little bit to make the reader feel more comfortable, but don’t hold it back. Good feedback is transparent, even when it may be obvious.

    There’s another advantage of asynchronous feedback: written feedback automatically tracks decisions. Especially in large projects, “Why did we do this?” could be a question that pops up from time to time, and there’s nothing better than open, transparent discussions that can be reviewed at any time. For this reason, I recommend using software that saves these discussions, without hiding them once they are resolved. 

    Content, tone, and format. Each one of these subjects provides a useful model, but working to improve eight areas—observation, impact, question, timing, attitude, form, clarity, and actionability—is a lot of work to put in all at once. One effective approach is to take them one by one: first identify the area that you lack the most (either from your perspective or from feedback from others) and start there. Then the second, then the third, and so on. At first you’ll have to put in extra time for every piece of feedback that you give, but after a while, it’ll become second nature, and your impact on the work will multiply.

    Thanks to Brie Anne Demkiw and Mike Shelton for reviewing the first draft of this article.

  • Asynchronous Design Critique: Getting Feedback

    Asynchronous Design Critique: Getting Feedback

    “Any comment?” is probably one of the worst ways to ask for feedback. It’s vague and open ended, and it doesn’t provide any indication of what we’re looking for. Getting good feedback starts earlier than we might expect: it starts with the request. 

    It might seem counterintuitive to start the process of receiving feedback with a question, but that makes sense if we realize that getting feedback can be thought of as a form of design research. In the same way that we wouldn’t do any research without the right questions to get the insights that we need, the best way to ask for feedback is also to craft sharp questions.

    Design critique is not a one-shot process. Sure, any good feedback workflow continues until the project is finished, but this is particularly true for design because design work continues iteration after iteration, from a high level to the finest details. Each level needs its own set of questions.

    And finally, as with any good research, we need to review what we got back, get to the core of its insights, and take action. Question, iteration, and review. Let’s look at each of those.

    The question

    Being open to feedback is essential, but we need to be precise about what we’re looking for. Just saying “Any comment?”, “What do you think?”, or “I’d love to get your opinion” at the end of a presentation—whether it’s in person, over video, or through a written post—is likely to get a number of varied opinions or, even worse, get everyone to follow the direction of the first person who speaks up. And then… we get frustrated because vague questions like those can turn a high-level flows review into people instead commenting on the borders of buttons. Which might be a hearty topic, so it might be hard at that point to redirect the team to the subject that you had wanted to focus on.

    But how do we get into this situation? It’s a mix of factors. One is that we don’t usually consider asking as a part of the feedback process. Another is how natural it is to just leave the question implied, expecting the others to be on the same page. Another is that in nonprofessional discussions, there’s often no need to be that precise. In short, we tend to underestimate the importance of the questions, so we don’t work on improving them.

    The act of asking good questions guides and focuses the critique. It’s also a form of consent: it makes it clear that you’re open to comments and what kind of comments you’d like to get. It puts people in the right mental state, especially in situations when they weren’t expecting to give feedback.

    There isn’t a single best way to ask for feedback. It just needs to be specific, and specificity can take many shapes. A model for design critique that I’ve found particularly useful in my coaching is the one of stage versus depth.

    Stage” refers to each of the steps of the process—in our case, the design process. In progressing from user research to the final design, the kind of feedback evolves. But within a single step, one might still review whether some assumptions are correct and whether there’s been a proper translation of the amassed feedback into updated designs as the project has evolved. A starting point for potential questions could derive from the layers of user experience. What do you want to know: Project objectives? User needs? Functionality? Content? Interaction design? Information architecture? UI design? Navigation design? Visual design? Branding?

    Here’re a few example questions that are precise and to the point that refer to different layers:

    • Functionality: Is automating account creation desirable?
    • Interaction design: Take a look through the updated flow and let me know whether you see any steps or error states that I might’ve missed.
    • Information architecture: We have two competing bits of information on this page. Is the structure effective in communicating them both?
    • UI design: What are your thoughts on the error counter at the top of the page that makes sure that you see the next error, even if the error is out of the viewport? 
    • Navigation design: From research, we identified these second-level navigation items, but once you’re on the page, the list feels too long and hard to navigate. Are there any suggestions to address this?
    • Visual design: Are the sticky notifications in the bottom-right corner visible enough?

    The other axis of specificity is about how deep you’d like to go on what’s being presented. For example, we might have introduced a new end-to-end flow, but there was a specific view that you found particularly challenging and you’d like a detailed review of that. This can be especially useful from one iteration to the next where it’s important to highlight the parts that have changed.

    There are other things that we can consider when we want to achieve more specific—and more effective—questions.

    A simple trick is to remove generic qualifiers from your questions like “good,” “well,” “nice,” “bad,” “okay,” and “cool.” For example, asking, “When the block opens and the buttons appear, is this interaction good?” might look specific, but you can spot the “good” qualifier, and convert it to an even better question: “When the block opens and the buttons appear, is it clear what the next action is?”

    Sometimes we actually do want broad feedback. That’s rare, but it can happen. In that sense, you might still make it explicit that you’re looking for a wide range of opinions, whether at a high level or with details. Or maybe just say, “At first glance, what do you think?” so that it’s clear that what you’re asking is open ended but focused on someone’s impression after their first five seconds of looking at it.

    Sometimes the project is particularly expansive, and some areas may have already been explored in detail. In these situations, it might be useful to explicitly say that some parts are already locked in and aren’t open to feedback. It’s not something that I’d recommend in general, but I’ve found it useful to avoid falling again into rabbit holes of the sort that might lead to further refinement but aren’t what’s most important right now.

    Asking specific questions can completely change the quality of the feedback that you receive. People with less refined critique skills will now be able to offer more actionable feedback, and even expert designers will welcome the clarity and efficiency that comes from focusing only on what’s needed. It can save a lot of time and frustration.

    The iteration

    Design iterations are probably the most visible part of the design work, and they provide a natural checkpoint for feedback. Yet a lot of design tools with inline commenting tend to show changes as a single fluid stream in the same file, and those types of design tools make conversations disappear once they’re resolved, update shared UI components automatically, and compel designs to always show the latest version—unless these would-be helpful features were to be manually turned off. The implied goal that these design tools seem to have is to arrive at just one final copy with all discussions closed, probably because they inherited patterns from how written documents are collaboratively edited. That’s probably not the best way to approach design critiques, but even if I don’t want to be too prescriptive here: that could work for some teams.

    The asynchronous design-critique approach that I find most effective is to create explicit checkpoints for discussion. I’m going to use the term iteration post for this. It refers to a write-up or presentation of the design iteration followed by a discussion thread of some kind. Any platform that can accommodate this structure can use this. By the way, when I refer to a “write-up or presentation,” I’m including video recordings or other media too: as long as it’s asynchronous, it works.

    Using iteration posts has many advantages:

    • It creates a rhythm in the design work so that the designer can review feedback from each iteration and prepare for the next.
    • It makes decisions visible for future review, and conversations are likewise always available.
    • It creates a record of how the design changed over time.
    • Depending on the tool, it might also make it easier to collect feedback and act on it.

    These posts of course don’t mean that no other feedback approach should be used, just that iteration posts could be the primary rhythm for a remote design team to use. And other feedback approaches (such as live critique, pair designing, or inline comments) can build from there.

    I don’t think there’s a standard format for iteration posts. But there are a few high-level elements that make sense to include as a baseline:

    1. The goal
    2. The design
    3. The list of changes
    4. The questions

    Each project is likely to have a goal, and hopefully it’s something that’s already been summarized in a single sentence somewhere else, such as the client brief, the product manager’s outline, or the project owner’s request. So this is something that I’d repeat in every iteration post—literally copy and pasting it. The idea is to provide context and to repeat what’s essential to make each iteration post complete so that there’s no need to find information spread across multiple posts. If I want to know about the latest design, the latest iteration post will have all that I need.

    This copy-and-paste part introduces another relevant concept: alignment comes from repetition. So having posts that repeat information is actually very effective toward making sure that everyone is on the same page.

    The design is then the actual series of information-architecture outlines, diagrams, flows, maps, wireframes, screens, visuals, and any other kind of design work that’s been done. In short, it’s any design artifact. For the final stages of work, I prefer the term blueprint to emphasize that I’ll be showing full flows instead of individual screens to make it easier to understand the bigger picture. 

    It can also be useful to label the artifacts with clear titles because that can make it easier to refer to them. Write the post in a way that helps people understand the work. It’s not too different from organizing a good live presentation. 

    For an efficient discussion, you should also include a bullet list of the changes from the previous iteration to let people focus on what’s new, which can be especially useful for larger pieces of work where keeping track, iteration after iteration, could become a challenge.

    And finally, as noted earlier, it’s essential that you include a list of the questions to drive the design critique in the direction you want. Doing this as a numbered list can also help make it easier to refer to each question by its number.

    Not all iterations are the same. Earlier iterations don’t need to be as tightly focused—they can be more exploratory and experimental, maybe even breaking some of the design-language guidelines to see what’s possible. Then later, the iterations start settling on a solution and refining it until the design process reaches its end and the feature ships.

    I want to highlight that even if these iteration posts are written and conceived as checkpoints, by no means do they need to be exhaustive. A post might be a draft—just a concept to get a conversation going—or it could be a cumulative list of each feature that was added over the course of each iteration until the full picture is done.

    Over time, I also started using specific labels for incremental iterations: i1, i2, i3, and so on. This might look like a minor labelling tip, but it can help in multiple ways:

    • Unique—It’s a clear unique marker. Within each project, one can easily say, “This was discussed in i4,” and everyone knows where they can go to review things.
    • Unassuming—It works like versions (such as v1, v2, and v3) but in contrast, versions create the impression of something that’s big, exhaustive, and complete. Iterations must be able to be exploratory, incomplete, partial.
    • Future proof—It resolves the “final” naming problem that you can run into with versions. No more files named “final final complete no-really-its-done.” Within each project, the largest number always represents the latest iteration.

    To mark when a design is complete enough to be worked on, even if there might be some bits still in need of attention and in turn more iterations needed, the wording release candidate (RC) could be used to describe it: “with i8, we reached RC” or “i12 is an RC.”

    The review

    What usually happens during a design critique is an open discussion, with a back and forth between people that can be very productive. This approach is particularly effective during live, synchronous feedback. But when we work asynchronously, it’s more effective to use a different approach: we can shift to a user-research mindset. Written feedback from teammates, stakeholders, or others can be treated as if it were the result of user interviews and surveys, and we can analyze it accordingly.

    This shift has some major benefits that make asynchronous feedback particularly effective, especially around these friction points:

    1. It removes the pressure to reply to everyone.
    2. It reduces the frustration from swoop-by comments.
    3. It lessens our personal stake.

    The first friction point is feeling a pressure to reply to every single comment. Sometimes we write the iteration post, and we get replies from our team. It’s just a few of them, it’s easy, and it doesn’t feel like a problem. But other times, some solutions might require more in-depth discussions, and the amount of replies can quickly increase, which can create a tension between trying to be a good team player by replying to everyone and doing the next design iteration. This might be especially true if the person who’s replying is a stakeholder or someone directly involved in the project who we feel that we need to listen to. We need to accept that this pressure is absolutely normal, and it’s human nature to try to accommodate people who we care about. Sometimes replying to all comments can be effective, but if we treat a design critique more like user research, we realize that we don’t have to reply to every comment, and in asynchronous spaces, there are alternatives:

    • One is to let the next iteration speak for itself. When the design evolves and we post a follow-up iteration, that’s the reply. You might tag all the people who were involved in the previous discussion, but even that’s a choice, not a requirement. 
    • Another is to briefly reply to acknowledge each comment, such as “Understood. Thank you,” “Good points—I’ll review,” or “Thanks. I’ll include these in the next iteration.” In some cases, this could also be just a single top-level comment along the lines of “Thanks for all the feedback everyone—the next iteration is coming soon!”
    • Another is to provide a quick summary of the comments before moving on. Depending on your workflow, this can be particularly useful as it can provide a simplified checklist that you can then use for the next iteration.

    The second friction point is the swoop-by comment, which is the kind of feedback that comes from someone outside the project or team who might not be aware of the context, restrictions, decisions, or requirements—or of the previous iterations’ discussions. On their side, there’s something that one can hope that they might learn: they could start to acknowledge that they’re doing this and they could be more conscious in outlining where they’re coming from. Swoop-by comments often trigger the simple thought “We’ve already discussed this…”, and it can be frustrating to have to repeat the same reply over and over.

    Let’s begin by acknowledging again that there’s no need to reply to every comment. If, however, replying to a previously litigated point might be useful, a short reply with a link to the previous discussion for extra details is usually enough. Remember, alignment comes from repetition, so it’s okay to repeat things sometimes!

    Swoop-by commenting can still be useful for two reasons: they might point out something that still isn’t clear, and they also have the potential to stand in for the point of view of a user who’s seeing the design for the first time. Sure, you’ll still be frustrated, but that might at least help in dealing with it.

    The third friction point is the personal stake we could have with the design, which could make us feel defensive if the review were to feel more like a discussion. Treating feedback as user research helps us create a healthy distance between the people giving us feedback and our ego (because yes, even if we don’t want to admit it, it’s there). And ultimately, treating everything in aggregated form allows us to better prioritize our work.

    Always remember that while you need to listen to stakeholders, project owners, and specific advice, you don’t have to accept every piece of feedback. You have to analyze it and make a decision that you can justify, but sometimes “no” is the right answer. 

    As the designer leading the project, you’re in charge of that decision. Ultimately, everyone has their specialty, and as the designer, you’re the one who has the most knowledge and the most context to make the right decision. And by listening to the feedback that you’ve received, you’re making sure that it’s also the best and most balanced decision.

    Thanks to Brie Anne Demkiw and Mike Shelton for reviewing the first draft of this article.

  • Designing for the Unexpected

    Designing for the Unexpected

    Although I’m not sure when I first heard this statement, it has over the centuries stuck in my mind. How do you generate solutions for scenarios you can’t think? Or create items that are functional on products that have not yet been created?

    Flash, Photoshop, and flexible pattern

    When I first started designing sites, my go-to technology was Photoshop. I created a design for a 960px paint that I would later add willing to. The growth phase was about attaining pixel-perfect precision using set widths, fixed levels, and absolute setting.

    All of this was altered by Ethan Marcotte’s speak at An Event Apart and the subsequent article in A Checklist Off in 2010. I was sold on reactive style as soon as I heard about it, but I was even terrified. The pixel-perfect models full of special figures that I had formerly prided myself on producing were no longer good enough.

    My first encounter with reactive style didn’t help my fear. My second project was to get an active fixed-width website and make it reactive. You can’t really put responsiveness at the end of a job, which I learned the hard way. To make smooth design, you need to prepare throughout the style stage.

    A new way to style

    Making flexible or liquid websites has always been about removing restrictions and creating content that can be viewed on any system. It relies on the use of percentage-based design, which I immediately achieved with local CSS and power groups:

    .column-span-6 { width: 49%; float: left; margin-right: 0.5%; margin-left: 0.5%;}.column-span-4 { width: 32%; float: left; margin-right: 0.5%; margin-left: 0.5%;}.column-span-3 { width: 24%; float: left; margin-right: 0.5%; margin-left: 0.5%;}

    Therefore with Sass but that I could use @includes to re-use repeated blocks of code and transition to more semantic premium:

    .logo { @include colSpan(6);}.search { @include colSpan(3);}.social-share { @include colSpan(3);}

    Media concerns

    The next ingredient for flexible design is press queries. Without them, content would shrink to fit the available space, regardless of whether it remained readable ( The exact opposite issue resulted from the development of a mobile-first approach ).

    Media concerns prevented this by allowing us to add breakpoints where the design could adapt. Like most people, I started out with three breakpoints: one for desktop, one for tablets, and one for mobile. Over the years, I added more and more for phablets, wide screens, and so on. 

    For years, I happily worked this way and improved both my design and front-end skills in the process. The only problem I encountered was making changes to content, since with our Sass grid system in place, there was no way for the site owners to add content without amending the markup—something a small business owner might struggle with. This is because each row in the grid was defined using a div as a container. Adding content meant creating new row markup, which requires a level of HTML knowledge.

    String premium was a mainstay of early flexible design, present in all the frequently used systems like Bootstrap and Skeleton.

    1 of 7
    2 of 7
    3 of 7
    4 of 7
    5 of 7
    6 of 7
    7 of 7

    Another difficulty arose as I moved from a design firm building websites for tiny- to medium-sized companies, to larger in-house teams where I worked across a collection of related sites. In those positions, I began to work more frequently with washable parts.

    Our rely on multimedia queries resulted in parts that were tied to frequent screen sizes. If the goal of part libraries is modify, then this is a real problem because you can just use these components if the devices you’re designing for correspond to the viewport sizes used in the pattern library—in the process never really hitting that “devices that don’t already occur” goal.

    Then there’s the problem of space. Media concerns allow components to adapt based on the viewport size, but what if I put a component into a sidebar, like in the figure below?

    Container queries: our savior or a false dawn?

    Container queries have long been touted as an improvement upon media queries, but at the time of writing are unsupported in most browsers. There are workarounds for JavaScript, but they can lead to dependencies and compatibility issues. The basic theory underlying container queries is that elements should change based on the size of their parent container and not the viewport width, as seen in the following illustrations.

    One of the biggest arguments in favor of container queries is that they help us create components or design patterns that are truly reusable because they can be picked up and placed anywhere in a layout. This is an important step in moving toward a form of component-based design that works at any size on any device.

    In other words, responsive layouts are to be replaced by responsive components.

    Container queries will help us move from designing pages that respond to the browser or device size to designing components that can be placed in a sidebar or in the main content, and respond accordingly.

    My issue is that layout is still used to determine when a design needs to adapt. This approach will always be restrictive, as we will still need pre-defined breakpoints. For this reason, my main question with container queries is, How would we decide when to change the CSS used by a component?

    The best place to make that choice is probably a component library that is disconnected from context and real content.

    As the diagrams below illustrate, we can use container queries to create designs for specific container widths, but what if I want to change the design based on the image size or ratio?

    In this example, the dimensions of the container are not what should dictate the design, rather, the image is.

    Without having strong cross-browser support for them, it’s difficult to say for certain whether container queries will be a success story. Responsive component libraries would definitely evolve how we design and would improve the possibilities for reuse and design at scale. However, we might need to modify these elements in order to fit our content.

    CSS is changing

    Whilst the container query debate rumbles on, there have been numerous advances in CSS that change the way we think about design. The days of fixed-width elements measured in pixels and floated div elements used to cobble layouts together are long gone, consigned to history along with table layouts. Flexbox and CSS Grid have revolutionized layouts for the web. We can now create elements that wrap onto new rows when they run out of space, not when the device changes.

    .wrapper { display: grid; grid-template-columns: repeat(auto-fit, 450px); gap: 10px;}

    The repeat() function paired with auto-fit or auto-fill allows us to specify how much space each column should use while leaving it up to the browser to decide when to spill the columns onto a new line. Similar things can be achieved with Flexbox, as elements can wrap over multiple rows and “flex” to fill available space. 

    .wrapper { display: flex; flex-wrap: wrap; justify-content: space-between;}.child { flex-basis: 32%; margin-bottom: 20px;}

    The biggest benefit of all of this is that you don’t have to wrap elements in container rows. Without rows, content isn’t tied to page markup in quite the same way, allowing for removals or additions of content without additional development.

    This is a big step forward when it comes to creating designs that allow for evolving content, but the real game changer for flexible designs is CSS Subgrid.

    Remember the days of crafting perfectly aligned interfaces, only for the customer to add an unbelievably long header almost as soon as they’re given CMS access, like the illustration below?

    Subgrid allows elements to respond to adjustments in their own content and in the content of sibling elements, helping us create designs more resilient to change.

    .wrapper { display: grid; grid-template-columns: repeat(auto-fit, minmax(150px, 1fr)); grid-template-rows: auto 1fr auto; gap: 10px;}.sub-grid { display: grid; grid-row: span 3; grid-template-rows: subgrid; /* sets rows to parent grid */}

    CSS Grid allows us to separate layout and content, thereby enabling flexible designs. Meanwhile, Subgrid allows us to create designs that can adapt in order to suit morphing content. The above code can be implemented behind an @supports feature query even though Firefox is the only browser that supports subgrid at the time of writing.

    Intrinsic layouts

    I’d be remiss not to mention intrinsic layouts, a term used by Jen Simmons to describe a mix of contemporary and traditional CSS features used to create layouts that respond to available space.

    Responsive layouts have flexible columns using percentages. Intrinsic layouts, on the other hand, use the fr unit to create flexible columns that won’t ever shrink so much that they render the content illegible.

    frunits is a statement that says I want you to distribute the extra space in this manner, but never that it should be smaller than the content inside.

    —Jen Simmons,” Designing Intrinsic Layouts”

    Additionally, intrinsic layouts can mix and match both fixed and flexible units, letting the content choose how much space is taken up.

    What makes intrinsic design stand out is that it not only creates designs that can withstand future devices but also helps scale design without losing flexibility. Without having to have the same breakpoints or content as in the previous implementation, components and patterns can be removed and reused.

    We can now create designs that adapt to the space they have, the content within them, and the content around them. We can create responsive components using an intrinsic approach without relying on container queries.

    Another 2010 moment?

    This intrinsic approach should in my view be every bit as groundbreaking as responsive web design was ten years ago. It’s another “everything changed” moment for me.

    But it doesn’t seem to be moving quite as fast, I haven’t yet had that same career-changing moment I had with responsive design, despite the widely shared and brilliant talk that brought it to my attention.

    One possible explanation for that might be that I now work for a sizable company, which is significantly different from the role I held as a design agency in 2010: In my agency days, every new project was a clean slate, a chance to try something new. Nowadays, projects use existing tools and frameworks and are often improvements to existing websites with an existing codebase.

    Another possibility is that I’m now more prepared for change. In 2010 I was new to design in general, the shift was frightening and required a lot of learning. Additionally, an intrinsic approach isn’t exactly all-new; it’s about applying existing skills and CSS knowledge in a unique way.

    You can’t framework your way out of a content problem

    Another reason for the slightly slower adoption of intrinsic design could be the lack of quick-fix framework solutions available to kick-start the change.

    Ten years ago, responsive grid systems were everywhere. With a framework like Bootstrap or Skeleton, you had a responsive design template at your fingertips.

    Because having a selection of units is a hindrance when creating layout templates, intrinsic design and frameworks do not work together quite as well. The beauty of intrinsic design is combining different units and experimenting with techniques to get the best for your content.

    And then there are design tools. We probably all used Photoshop templates for desktop, tablet, and mobile devices to drop designs into and show how the site would appear throughout our careers at some point.

    How do you do that now, with each component responding to content and layouts flexing as and when they need to? This kind of design must take place in the browser, which is something I’m very fond of.

    The debate about “whether designers should code” is another that has rumbled on for years. When designing a digital product, we should, at the very least, design for a best- and worst-case scenario when it comes to content. It’s not ideal to do this in a graphics-based software package. In code, we can add longer sentences, more radio buttons, and extra tabs, and watch in real time as the design adapts. Still in use? Is the design too reliant on the current content?

    Personally, I look forward to the day intrinsic design is the standard for design, when a design component can be truly flexible and adapt to both its space and content with no reliance on device or container dimensions.

    Content should come first

    Content is not constant. After all, to design for the unanticipated or unexpected, we must take into account changes in content, like in our earlier Subgrid card illustration, which allowed the cards to modify both their own content and that of their sibling components.

    Thankfully, there’s more to CSS than layout, and plenty of properties and values can help us put content first. Subgrid and pseudo-elements like ::first-line and ::first-letter help to separate design from markup so we can create designs that allow for changes.

    Instead of the dated markup tricks below,

    First line of text with different styling...

    —we can target content based on where it appears.

    .element::first-line { font-size: 1.4em;}.element::first-letter { color: red;}

    Much bigger additions to CSS include logical properties, which change the way we construct designs using logical dimensions (start and end) instead of physical ones (left and right), something CSS Grid also does with functions like min(), max(), and clamp().

    This flexibility allows for directional changes according to content, a common requirement when we need to present content in multiple languages. In the past, this was often achieved with Sass mixins but was often limited to switching from left-to-right to right-to-left orientation.

    Directional variables must be set in the Sass version.

    $direction: rtl;$opposite-direction: ltr;$start-direction: right;$end-direction: left;

    These variables can be used as values—

    body { direction: $direction; text-align: $start-direction;}

    —or as real estate.

    margin-#{$end-direction}: 10px;padding-#{$start-direction}: 10px;

    However, now we have native logical properties, removing the reliance on both Sass ( or a similar tool ) and pre-planning that necessitated using variables throughout a codebase. These properties also start to break apart the tight coupling between a design and strict physical dimensions, creating more flexibility for changes in language and in direction.

    margin-block-end: 10px;padding-block-start: 10px;

    There are also native start and end values for properties like text-align, which means we can replace text-align: right with text-align: start.

    Like the earlier examples, these properties help to build out designs that aren’t constrained to one language, the design will reflect the content’s needs.

    Fluid and fixed

    We briefly covered the power of combining fixed widths with fluid widths with intrinsic layouts. The min() and max() functions are a similar concept, allowing you to specify a fixed value with a flexible alternative. 

    For min() this means setting a fluid minimum value and a maximum fixed value.

    .element { width: min(50%, 300px);}

    The element in the figure above will be 50 % of its container as long as the element’s width doesn’t exceed 300px.

    For max() we can set a flexible max value and a minimum fixed value.

    .element { width: max(50%, 300px);}

    Now the element will be 50 % of its container as long as the element’s width is at least 300px. This means we can set limits but allow content to react to the available space.

    The clamp() function builds on this by allowing us to set a preferred value with a third parameter. Now we can allow the element to shrink or grow if it needs to without getting to a point where it becomes unusable.

    .element { width: clamp(300px, 50%, 600px);}

    This time, the element’s width will be 50 % ( the preferred value ) of its container, with no exceptions for 300px and 600px.

    With these techniques, we have a content-first approach to responsive design. We can separate content from markup, meaning the changes users make will not affect the design. By anticipating unforeseen language or direction changes, we can begin creating future-proofing designs. And we can increase flexibility by setting desired dimensions alongside flexible alternatives, allowing for more or less content to be displayed correctly.

    First, the situation

    Thanks to what we’ve discussed so far, we can cover device flexibility by changing our approach, designing around content and space instead of catering to devices. But what about that last bit of Jeffrey Zeldman’s quote,”… situations you haven’t imagined”?

    Rather than someone using a mobile phone and moving through a crowded street in glaring sunshine, it’s a very different design to be done for someone using a desktop computer. Situations and environments are hard to plan for or predict because they change as people react to their own unique challenges and tasks.

    This is why making a decision is so crucial. One size never fits all, so we need to design for multiple scenarios to create equal experiences for all our users.

    Thankfully, there is a lot we can do to provide choice.

    Responsible design

    ” There are parts of the world where mobile data is prohibitively expensive, and where there is little or no broadband infrastructure”.

    On a 50 MB budget, I spent a day surfing the web.

    Chris Ashton

    One of the biggest assumptions we make is that people interacting with our designs have a good wifi connection and a wide screen monitor. However, in the real world, our users may be commuters using smaller mobile devices that may experience drops in connectivity while traveling on trains or other modes of transportation. There is nothing more frustrating than a web page that won’t load, but there are ways we can help users use less data or deal with sporadic connectivity.

    The srcset attribute allows the browser to decide which image to serve. This means we can create smaller ‘cropped’ images to display on mobile devices in turn using less bandwidth and less data.

    Image alt text

    The preload attribute can also help us to think about how and when media is downloaded. It can be used to tell a browser about any critical assets that need to be downloaded with high priority, improving perceived performance and the user experience. 


    There’s also native lazy loading, which indicates assets that should only be downloaded when they are needed.

    …

    With srcset, preload, and lazy loading, we can start to tailor a user’s experience based on the situation they find themselves in. What none of this does, however, is allow the user themselves to decide what they want downloaded, as the decision is usually the browser’s to make. 

    So how can we put users in control?

    The media queries are now being returned.

    Media concerns have always been about much more than device sizes. They allow content to adapt to different situations, with screen size being just one of them.

    We’ve long been able to check for media types like print and speech and features such as hover, resolution, and color. These checks allow us to provide options that suit more than one scenario, it’s less about one-size-fits-all and more about serving adaptable content.

    The Level 5 spec for Media Queries is still being developed at this writing. It introduces some really exciting queries that in the future will help us design for multiple other unexpected situations.

    For instance, there is a light-level feature that enables you to alter a user’s style when they are in the sun or the darkness. Paired with custom properties, these features allow us to quickly create designs or themes for specific environments.

    @media (light-level: normal) { --background-color: #fff; --text-color: #0b0c0c; }@media (light-level: dim) { --background-color: #efd226; --text-color: #0b0c0c;}

    Another key feature of the Level 5 spec is personalization. Instead of creating designs that are the same for everyone, users can choose what works for them. This is achieved by using features like prefers-reduced-data, prefers-color-scheme, and prefers-reduced-motion, the latter two of which already enjoy broad browser support. These features tap into preferences set via the operating system or browser so people don’t have to spend time making each site they visit more usable. 

    Media concerns like this go beyond choices made by a browser to grant more control to the user.

    Expect the unexpected

    In the end, we should always anticipate that things will change. Devices in particular change faster than we can keep up, with foldable screens already on the market.

    We can design for content, but we can’t do it the same way we have for this constantly changing landscape. By putting content first and allowing that content to adapt to whatever space surrounds it, we can create more robust, flexible designs that increase the longevity of our products.

    A lot of the CSS discussed here is about moving away from layouts and putting content at the heart of design. There is so much more we can do to adopt a more intrinsic approach, from responsive components to fixed and fluid units. Even better, we can test these techniques during the design phase by designing in-browser and watching how our designs adapt in real-time.

    When it comes to unexpected circumstances, we need to make sure our goods are accessible whenever and wherever needed. We can move closer to achieving this by involving users in our design decisions, by creating choice via browsers, and by giving control to our users with user-preference-based media queries.

    Good design for the unexpected should allow for change, provide choice, and give control to those we serve: our users themselves.

  • Voice Content and Usability

    Voice Content and Usability

    We’ve been conversing for a long time. Whether to present information, perform transactions, or just to check in on one another, people have yammered aside, chattering and gesticulating, through spoken discussion for many generations. Only recently have we begun to write our conversations, and only recently have we outsourced them to the system, a system that exhibits a far greater affection for written communications than for the vernacular rigors of spoken speech.

    Laptops have trouble because between spoken and written speech, talk is more primitive. Machines must wrestle with the chaos of human statement, including the squabbling and pauses, the gestures and body vocabulary, and the dialect variations that can impede even the most skillfully created human-computer conversation. In the human-to-human situation, spoken language also has the opportunity of face-to-face call, where we can easily interpret verbal interpersonal cues.

    In contrast, written language develops its own fossil record of dated terms and phrases as we report it and keep utilization long after they are no longer needed in spoken communication ( for example, the welcome” To whom it may concern” ). Because it tends to be more consistent, smooth, and proper, written word is necessarily far easier for devices to interpret and know.

    Spoken speech is not a pleasure in this regard. Besides the visual cues that mark conversations with emphasis and personal context, there are also linguistic cues and outspoken behaviors that mimic conversation in complex ways: how something is said, never what. Our spoken language conveys much more than the published word can actually contain, whether it’s rapid-fire, low-pitched, high-decibel, sarcastic, awkward, or groaning. But when it comes to tone interfaces—the devices we conduct spoken discussions with—we experience exciting difficulties as designers and content strategists.

    Voice Compositions

    We interact with voice interfaces for a variety of reasons, but according to Michael McTear, Zoraida Callejas, and David Griol in The Conversational Interface, those motivations by and large mirror the reasons we initiate conversations with other people, too ( ). We typically strike up a discussion in the following ways:

    • we need something done ( such as a transaction ),
    • we seek knowledge of anything ( some kind of data ), or
    • we are social people and want someone to talk to ( conversation for conversation’s pleasure ).

    These three categories, which I refer to as transactional, technical, and prosocial, also apply to basically every voice interaction: a solitary conversation that starts with the voice interface’s initial greeting and ends with the user leaving the interface. Notice here that a discussion in our individual sense—a talk between people that leads to some outcome and lasts an arbitrary length of time—could encompass many interpersonal, technical, and interpersonal voice interactions in succession. In other words, a voice interaction is a conversation, but it must not be one particular voice interaction.

    Purely prosocial conversations are more gimmicky than captivating in most voice interfaces, because machines don’t yet have the capacity to really want to know how we’re doing and to do the sort of glad-handing humans crave. Users are also debating whether or not they prefer the kind of organic human conversation that starts with a prosocial voiceover and progresses seamlessly into other types. In fact, in Voice User Interface Design, Michael Cohen, James Giangola, and Jennifer Balogh recommend sticking to users ‘ expectations by mimicking how they interact with other voice interfaces rather than trying too hard to be human—potentially alienating them in the process ( ).

    That leaves two different types of conversations we can have with one another that a voice interface can also have easily, such as one that focuses on a transactional voice interaction ( buying iced tea ) and another on learning something new ( discuss a musical ).

    Transactional voice interactions

    When you order a Hawaiian pizza with extra pineapple, you’re typically having a conversation and a voice interaction when you’re tapping buttons on a food delivery app. Even when we walk up to the counter and place an order, the conversation quickly pivots from an initial smattering of neighborly small talk to the real mission at hand: ordering a pizza ( generously topped with pineapple, as it should be ).

    Alison: Hey, how are things going?

    Burhan: Hi, welcome to Crust Deluxe! It’s chilly outside. How can I help you?

    Alison: Can I get a pizza from Hawaii with extra pineapple.

    Burhan: Sure, what size?

    Large, Alison.

    Burhan: Anything else?

    Alison: No, that’s it.

    Burhan: Something to drink?

    Alison: I’ll have a bottle of Coke.

    Burhan: You got it. That will cost$ 13.55 and take about fifteen minutes.

    Each progressive disclosure in this transactional conversation reveals more and more of the desired outcome of the transaction: a service rendered or a product delivered. Conversations that are transactional have certain characteristics: they are direct, precise, and cost-effective. They quickly dispense with pleasantries.

    Informational voice interactions

    Meanwhile, some conversations are primarily about obtaining information. Alison might visit Crust Deluxe with the sole intention of placing an order, but she might not want to leave with a pizza at all. She might be just as interested in whether they serve halal or kosher dishes, gluten-free options, or something else. Even though we have a prosocial mini-conversation once more at the beginning to practice politeness, we are after much more.

    Alison: Hey, how are things going?

    Burhan: Hi, welcome to Crust Deluxe! It’s chilly outside. How can I help you?

    Alison: Can I ask a few questions?

    Burhan: Of course! Go right ahead.

    Do you have any halal options available on the menu, Alison?

    Burhan: Absolutely! On request, we can make any pie halal. We also have lots of vegetarian, ovo-lacto, and vegan options. Do you have any other dietary restrictions in mind?

    Alison: What about gluten-free pizzas?

    Burhan: For both our deep-dish and thin-crust pizzas, we can definitely make a gluten-free crust for you, without a problem. Anything else I can answer for you?

    Alison: That’s it for now. Good to know. Thank you!

    Burhan: Anytime, come back soon!

    This dialogue is entirely different. Here, the goal is to get a certain set of facts. Informational conversations are research expeditions to gather data, news, or facts, or they are investigative quests for the truth. Voice interactions that are informational might be more long-winded than transactional conversations by necessity. Responses are typically longer, more in-depth, and carefully communicated so that the customer is aware of the important lessons.

    Voice Interfaces

    Voice-based user interfaces use speech at the core to assist users in accomplishing their objectives. But simply because an interface has a voice component doesn’t mean that every user interaction with it is mediated through voice. We’re most concerned with pure voice interfaces, which depend entirely on spoken conversation and lack any visual component, making multimodal voice interfaces much more nuanced and challenging to deal with because they can lean on visual components like screens as crutches.

    Though voice interfaces have long been integral to the imagined future of humanity in science fiction, only recently have those lofty visions become fully realized in genuine voice interfaces.

    IVR ( interactive voice response ) systems

    Though written conversational interfaces have been fixtures of computing for many decades, voice interfaces first emerged in the early 1990s with text-to-speech ( TTS ) dictation programs that recited written text aloud, as well as speech-enabled in-car systems that gave directions to a user-provided address. We became familiar with the first real voice interfaces that could actually be spoken to without having to deal with overburdened customer service representatives as a result of the development of interactive voice response ( IVR ) systems.

    IVR systems allowed organizations to reduce their reliance on call centers but soon became notorious for their clunkiness. Similar to the corporate world, these systems were primarily created as metaphorical switchboards to direct customers to a real phone agent (” Say Reservations to book a flight or check an itinerary” ), and chances are you’ll have a conversation with one when you call an airline or hotel conglomerate. Despite their functional issues and users ‘ frustration with their inability to speak to an actual human right away, IVR systems proliferated in the early 1990s across a variety of industries (, PDF).

    IVR systems have a reputation for having less scintillating conversation than we’re used to in real life ( or even in science fiction ), but they are great for highly repetitive, monotonous conversations that typically don’t veer from a single format.

    Screen readers

    The invention of the screen reader, a tool that converts visual content into synthesized speech, was a development of IVR systems in parallel. For Blind or visually impaired website users, it’s the predominant method of interacting with text, multimedia, or form elements. Perhaps the closest thing we have today to an out-of-the-box delivery of content via voice is represented by screen readers.

    Among the first screen readers known by that moniker was the Screen Reader for the BBC Micro and NEEC Portable developed by the Research Centre for the Education of the Visually Handicapped (RCEVH) at the University of Birmingham in 1986 ( ). The first IBM Screen Reader for text-based computers was created by Jim Thatcher in the same year, which was later recreated for computers with graphical user interfaces ( GUIs ) ( ).

    With the rapid growth of the web in the 1990s, the demand for accessible tools for websites exploded. Screen readers started facilitating quick interactions with web pages that ostensibly allow disabled users to traverse the page as an aural and temporal space rather than a visual and physical one with the introduction of semantic HTML and especially ARIA roles in 2008, enabling speedy interactions with the pages. In other words, screen readers for the web “provide mechanisms that translate visual design constructs—proximity, proportion, etc. —into useful information,” according to Aaron Gustafson in A List Apart. ” At least they do when documents are authored thoughtfully” ( ).

    Although incredibly instructive for voice interface designers, screen readers have a major flaw: they’re challenging to use and consistently verbose. The visual structures of websites and web navigation don’t translate well to screen readers, sometimes resulting in unwieldy pronouncements that name every manipulable HTML element and announce every formatting change. Working with web-based interfaces takes a cognitive toll for many screen reader users.

    In Wired, accessibility advocate and voice engineer Chris Maury considers why the screen reader experience is ill-suited to users relying on voice:

    I disliked the operation of Screen Readers from the beginning. Why are they designed the way they are? It makes no sense to present information visually and then only to have that information translated into audio. All of the time and energy that goes into creating the perfect user experience for an app is wasted, or even worse, adversely impacting the experience for blind users. ( ) _ _ _

    In many cases, well-designed voice interfaces can speed users to their destination better than long-winded screen reader monologues. After all, users of the visual interface have the advantage of freely scurrying around the viewport to find information without getting too close to it. Blind users, meanwhile, are obligated to listen to every utterance synthesized into speech and therefore prize brevity and efficiency. Users with disabilities who have long had no choice but to use clumsy screen readers might find that voice interfaces, especially more contemporary voice assistants, provide a more streamlined experience.

    Voice assistants

    Many of us immediately associate voice assistants with the subset of voice interfaces that are now commonplace in living rooms, smart homes, and offices with the film HAL from 2001: A Space Odyssey or Majel Barrett’s voice as the omniscient computer in Star Trek. Voice assistants are akin to personal concierges that can answer questions, schedule appointments, conduct searches, and perform other common day-to-day tasks. And because of their assistive potential, they are quickly receiving more attention from accessibility advocates.

    Before the earliest IVR systems found success in the enterprise, Apple published a demonstration video in 1987 depicting the Knowledge Navigator, a voice assistant that could transcribe spoken words and recognize human speech to a great degree of accuracy. Then, in 2001, Tim Berners-Lee and others created their vision for a Semantic Web “agent” that would carry out routine tasks like” checking calendars, making appointments, and finding locations” (, behind paywall ). It wasn’t until 2011 that Apple’s Siri finally entered the picture, making voice assistants a tangible reality for consumers.

    There is a significant variation in how programmable and customizable some voice assistants are compared to others due to the sheer number of voice assistants available today ( Fig 1 ). At one extreme, everything except vendor-provided features is locked down, for example, at the time of their release, the core functionality of Apple’s Siri and Microsoft’s Cortana couldn’t be extended beyond their existing capabilities. There are no other means by which developers can interact with Siri at a low level, aside from predefined categories of tasks like sending messages, hailing rideshares, making restaurant reservations, and other things, which are still unavoidable today.

    At the opposite end of the spectrum, voice assistants like Amazon Alexa and Google Home offer a core foundation on which developers can build custom voice interfaces. For this reason, developers who feel stifled by the limitations of Siri and Cortana are increasingly using programmable voice assistants that allow for customization and extensibility. Amazon offers the Alexa Skills Kit, a developer framework for building custom voice interfaces for Amazon Alexa, while Google Home offers the ability to program arbitrary Google Assistant skills. Users of the Amazon Alexa and Google Assistant ecosystems can choose from among the thousands of custom-built skills available today.

    As businesses like Amazon, Apple, Microsoft, and Google continue to occupy their positions, they’re also selling and open-sourcing an unheard array of tools and frameworks for designers and developers that aim to make creating voice interfaces as simple as possible, even without code.

    Often by necessity, voice assistants like Amazon Alexa tend to be monochannel—they’re tightly coupled to a device and can’t be accessed on a computer or smartphone instead. In contrast, many development platforms, such as Google’s Dialogflow, have omnichannel capabilities that allow users to create a single conversational interface that then manifests as a voice interface, textual chatbot, and IVR system upon deployment. I don’t prescribe any specific implementation approaches in this design-focused book, but in Chapter 4 we’ll get into some of the implications these variables might have on the way you build out your design artifacts.

    Voice content

    Simply put, voice content is content delivered through voice. Voice content must be free-flowing and organic, contextless and concise—everything written content isn’t enough to preserve what makes human conversation so compelling in the first place.

    Our world is replete with voice content in various forms: screen readers reciting website content, voice assistants rattling off a weather forecast, and automated phone hotline responses governed by IVR systems. We’re most concerned with the content in this book being delivered auditorically, not as an option but as a necessity.

    For many of us, our first foray into informational voice interfaces will be to deliver content to users. One issue is that any content we already have isn’t in any way suitable for this new environment. So how do we make the content trapped on our websites more conversational? And how do we create fresh copy that works with voice-activated text?

    Lately, we’ve begun slicing and dicing our content in unprecedented ways. Websites are, in many ways, colossal vaults of what I call macrocontent: lengthy prose that can last for miles in a browser window, like microfilm viewers of newspaper archives. Back in 2002, well before the present-day ubiquity of voice assistants, technologist Anil Dash defined microcontent as permalinked pieces of content that stay legible regardless of environment, such as email or text messages:

    An example of microcontent can be a day’s weather forecast [sic], an airplane flight’s arrival and departure times, an abstract from a lengthy publication, or a single instant message. ( ) _ _ _

    I would update Dash’s definition of microcontent to include all instances of bite-sized content that transcends written communiqués. After all, today we encounter microcontent in interfaces where a small snippet of copy is displayed alone, unmoored from the browser, like a textbot confirmation of a restaurant reservation. The best way to learn how your content can be stretched to the limits of its potential is through microcontent, which will inform both established and new delivery channels.

    As microcontent, voice content is unique because it’s an example of how content is experienced in time rather than in space. We can instantly see when the next train is coming from a digital sign underground, but voice interfaces keep our attention occupied for so long that screen reader users are all too familiar.

    Because microcontent is fundamentally made up of isolated blobs with no relation to the channels where they’ll eventually end up, we need to ensure that our microcontent truly performs well as voice content—and that means focusing on the two most important traits of robust voice content: voice content legibility and voice content discoverability.

    Our voice content’s legibility and discoverability in general both depend on how it manifests in terms of perceived space and time.

  • Sustainable Web Design, An Excerpt

    Sustainable Web Design, An Excerpt

    Many wealthy runners had come to the conclusion that it was impossible to run a mile in less than four hours in the 1950s. Riders had been attempting it since the later 19th century and were beginning to draw the conclusion that the human body just wasn’t built for the job.

    But Roger Bannister surprised all on May 6, 1956. It was a cold, damp morning in Oxford, England—conditions no one expected to give themselves to record-setting—and but Bannister did really that, running a mile in 3: 59.4 and becoming the first people in the history books to run a mile in under four hours.

    The world today knew that the four-minute hour was possible because of this change in the standard. Bannister’s history lasted just forty-six days, when it was snatched aside by American sprinter John Landy. Therefore, in the same race, three athletes managed to cross the four-minute challenge together. Since therefore, over 1, 400 walkers have actually run a mile in under four days, the current document is 3: 43.13, held by Moroccan performer Hicham El Guerrouj.

    We do a lot more when we think something is possible, and we only think it can be done when we see someone else doing it once more. As for man running speed, we also think there are strict guidelines for how a website should do.

    Establishing requirements for a green website

    The key indicators of climate performance in most big companies are very well established, such as power per square metre for homes and miles per gallon for cars. The tools and methods for calculating those measures are standardized as well, which keeps everyone on the same site when doing economic evaluations. However, in the world of websites and apps, we aren’t held to any specific environmental standards, and we have only recently developed the tools and methods we need to actually conduct an environmental assessment.

    The main objective in green web layout is to reduce carbon emissions. However, it’s nearly impossible to accurately assess the amount of CO2 that a website merchandise produces. We can’t measure the pollutants coming out of the exhaust valves on our devices. Our websites ‘ emissions are far away, out of mind, and out of sight when fuel and oil are burned in power plants. We have no way to track the particles from a website or app up to the power station where the light is being generated and really know the exact amount of house oil produced. What then do we do?

    If we can‘t measure the actual carbon pollution, therefore we need to get what we can measure. The following are the main elements that could be used as coal pollution gauges:

    1. Transfer of data
    2. Electricity’s carbon power

    Let’s take a look at how we can use these indicators to calculate the energy use, and in turn the carbon footprint, of the sites and web applications we create.

    Transfer of data

    Most researchers use kilowatt-hours per gigabyte (k Wh/GB ) as a metric of energy efficiency when measuring the amount of data transferred over the internet when a website or application is used. This serves as a wonderful example of how much energy is consumed and how much coal is released. As a rule of thumb, the more files transferred, the more electricity used in the data center, telecoms systems, and end users products.

    The most accurate way to calculate data exchange for a second visit for web pages is to measure the page weight, which is the first time a user visits the page in kilobytes. It’s very easy to measure using the engineer equipment in any modern internet browser. Statistics for the total data transfer of any web application are frequently included in your web hosting account ( Fig. 2.1 ).

    The great thing about website weight as a parameter is that it allows us to compare the effectiveness of web pages on a level playing field without confusing the issue with frequently changing traffic volumes.

    A large scope is required to reduce page weight. By early 2020, the median page weight was 1.97 MB for setups the HTTP Archive classifies as “desktop” and 1.77 MB for “mobile”, with desktop increasing 36 percent since January 2016 and mobile page weights nearly doubling in the same period ( Fig 2.2 ). Image files account for the majority of this data transfer, making them the single biggest contributor to carbon emissions on a typical website.

    History clearly shows us that our web pages can be smaller, if only we set our minds to it. While the majority of technologies, including the web’s underlying technology like data centers and transmission networks, become more and more energy-efficient, websites themselves become less effective as time goes on.

    You might be aware of the idea behind performance budgeting as a method for directing a project team to deliver faster user experiences. For example, we might specify that the website must load in a maximum of one second on a broadband connection and three seconds on a 3G connection. Performance budgets are upper limits rather than hazy ideas, much like speed limits while driving. As a result, the goal should always be to stay within budget.

    Designing for fast performance does often lead to reduced data transfer and emissions, but it isn’t always the case. Page weight and transfer size are more objective and reliable benchmarks for sustainable web design, whereas web performance is frequently more about the subjective perception of load times than it is about the underlying system’s actual efficiency.

    We can set a page weight budget in reference to a benchmark of industry averages, using data from sources like HTTP Archive. We can also use competitor page weight to compare the new website to the old one. For example, we might set a maximum page weight budget as equal to our most efficient competitor, or we could set the benchmark lower to guarantee we are best in class.

    If we want to take it to the next level, we could start looking at how much more popular our web pages are when people visit them frequently. Although page weight for the first time someone visits is the easiest thing to measure, and easy to compare on a like-for-like basis, we can learn even more if we start looking at transfer size in other scenarios too. For instance, visitors who load the same page more frequently will likely have a high percentage of the files cached in their browser, which means they won’t need to move all the files on subsequent visits. Likewise, a visitor who navigates to new pages on the same website will likely not need to load the full page each time, as some global assets from areas like the header and footer may already be cached in their browser. Moving beyond the first visit and measuring page weight budgets for scenarios beyond this level of detail can help us learn even more about how to optimize efficiency for users who regularly visit our pages.

    Page weight budgets are easy to track throughout a design and development process. Although they don’t directly disclose their data on energy consumption and carbon emissions, they do provide a clear indicator of efficiency in comparison to other websites. And as transfer size is an effective analog for energy consumption, we can actually use it to estimate energy consumption too.

    In summary, less data transfer leads to more energy efficiency, which is a crucial component of lowering web product carbon emissions. The more efficient our products, the less electricity they use, and the less fossil fuels need to be burned to produce the electricity to power them. However, as we’ll see next, it’s important to take into account the source of that electricity because all web products require some power.

    Electricity’s carbon power

    Regardless of energy efficiency, the level of pollution caused by digital products depends on the carbon intensity of the energy being used to power them. The term” carbon intensity” (gCO2/k Wh ) is used to describe how much carbon dioxide is produced for each kilowatt-hour of electricity produced. This varies widely, with renewable energy sources and nuclear having an extremely low carbon intensity of less than 10 gCO2/k Wh ( even when factoring in their construction ), whereas fossil fuels have very high carbon intensity of approximately 200–400 gCO2/k Wh.

    The majority of electricity is produced by national or state grids, where energy from a variety of sources is combined with various levels of carbon intensity. The distributed nature of the internet means that a single user of a website or app might be using energy from multiple different grids simultaneously, a website user in Paris uses electricity from the French national grid to power their home internet and devices, but the website’s data center could be in Dallas, USA, pulling electricity from the Texas grid, while the telecoms networks use energy from everywhere between Dallas and Paris.

    Although we have some control over where our projects are hosted, we do not have complete control over the energy supply of web services. With a data center using a significant proportion of the energy of any website, locating the data center in an area with low carbon energy will tangibly reduce its carbon emissions. This user-provided data is reported and mapped by Danish startup Tomorrow, and a look at their map demonstrates how, for instance, choosing a data center in France will result in significantly lower carbon emissions than choosing a data center in the Netherlands ( Fig. 2.3 ).

    Having said that, we don’t want to locate our servers too far away from our users; however, it takes energy to transmit data through the telecom’s networks, and the more energy is used, the further the data travels. Just like food miles, we can think of the distance from the data center to the website’s core user base as “megabyte miles” —and we want it to be as small as possible.

    We can use website analytics to determine the country, state, or even city where our core user group is located and measure the distance from that location to the data center used by our hosting company by using the distance itself as a benchmark. This will be a somewhat fuzzy metric as we don’t know the precise center of mass of our users or the exact location of a data center, but we can at least get a rough idea.

    For instance, if a website is hosted in London but the main audience is on the United States ‘ West Coast, we could look up the travel distance between London and San Francisco, which is 5,300 miles. That’s a long way! We can see how hosting it somewhere in North America, ideally on the West Coast, would significantly shorten the distance and the amount of energy needed to transmit the data. In addition, locating our servers closer to our visitors helps reduce latency and delivers better user experience, so it’s a win-win.

    Reverting it to carbon emissions

    If we combine carbon intensity with a calculation for energy consumption, we can calculate the carbon emissions of our websites and apps. A tool my team created accomplishes this by measuring the data transfer over the wire when a web page is loaded, calculating the associated electricity consumption, and then converting that data into a CO2 figure ( Fig. 2.4). It also factors in whether or not the web hosting is powered by renewable energy.

    The Energy and Emissions Worksheet that comes with this book teaches you how to improve it and tailor the data more appropriately to your project’s unique features.

    With the ability to calculate carbon emissions for our projects, we could even set up carbon budgets as well. CO2 is not a metric commonly used in web projects, we’re more familiar with kilobytes and megabytes, and can fairly easily look at design options and files to assess how big they are. Although translating that into carbon adds an air of abstraction, carbon budgets do focus our minds on the main issue we’re trying to reduce, which also supports the main goal of sustainable web design: reducing carbon emissions.

    Browser Energy

    Transfer of data might be the simplest and most complete analog for energy consumption in our digital projects, but by giving us one number to represent the energy used in the data center, the telecoms networks, and the end user’s devices, it can’t offer us insights into the efficiency in any specific part of the system.

    One part of the system we can look at in more detail is the energy used by end users ‘ devices. The computational burden is increasingly shifting from the data center to the users ‘ devices, whether they are phones, tablets, laptops, desktops, or even smart TVs, as front-end web technologies advance. Modern web browsers allow us to implement more complex styling and animation on the fly using CSS and JavaScript. Additionally, JavaScript libraries like Angular and React make it possible to create applications where the” thinking” process is performed either partially or completely in the browser.

    All of these advances are exciting and open up new possibilities for what the web can do to serve society and create positive experiences. However, more energy is used by the user’s devices as a result of the user’s web browser’s increased computation. This has implications not just environmentally, but also for user experience and inclusivity. Applications that put a lot of processing power on a user’s device unintentionally exclude those who have older, slower devices and make the batteries on phones and laptops drain more quickly. Furthermore, if we build web applications that require the user to have up-to-date, powerful devices, people throw away old devices much more frequently. This not only harms the environment, but it places a disproportionate financial burden on the poorest members of society.

    In part because the tools are limited, and partly because there are so many different models of devices, it’s difficult to measure website energy consumption on end users ‘ devices. The Energy Impact monitor inside the developer console of the Safari browser is one of the tools we currently have ( Fig. 2.5 ).

    You know what happens when your computer’s cooling fans start spinning so frantically that you suspect it might take off when you load a website? That’s essentially what this tool is measuring.

    It uses these figures to create an energy impact rating and shows the percentage of CPU used and how long the CPU used when loading the web page last. It doesn’t give us precise data for the amount of electricity used in kilowatts, but the information it does provide can be used to benchmark how efficiently your websites use energy and set targets for improvement.

  • Design for Safety, An Excerpt

    Design for Safety, An Excerpt

    According to anti-racist analyst Kim Crayton, “intention without plan is chaos.” We’ve discussed how our prejudices, beliefs, and carelessness toward marginalized and resilient parties lead to dangerous and irresponsible tech—but what, precisely, do we need to do to fix it? We need a strategy, not just the desire to make our technology safer.

    This section will provide you with that plan of action. It covers how to incorporate safety principles into your design work in order to make tech that’s secure, how to persuade your stakeholders that this work is important, and how to respond to the critique that what we really need is more diversity. ( Spoiler: we do, but diversity alone is not the solution to fixing unethical, unsafe technology. )

    The method for equitable safety

    Your objectives when designing for protection are as follows:

    • discover ways your solution can be used for abuse,
    • style ways to prevent the maltreatment, and
    • offer assistance for harmed people to regain control and power.

    The Process for Inclusive Safety is a tool to help you reach those goals ( Fig 5.1 ). I developed this strategy in 2018 to better understand the different methods I used to create products that were designed with safety in mind. Whether you are creating an entirely new product or adding to an existing element, the Process can help you produce your product secure and diverse. The Process includes five public areas of action:

    • conducting studies
    • Creating tropes
    • pondering issues
    • Designing answers
    • Testing for health

    The Process is meant to be flexible; in some situations, it didn’t make sense for groups to employ every step. Use the parts that are related to your special function and environment, this is meant to be something you can put into your existing style process.

    And once you use it, if you have an idea for making it better or simply want to give perspective of how it helped your staff, please get in touch with me. It’s a life report that I hope technicians can use as a practical and useful resource in their day-to-day work.

    If you’re working on a product especially for a resilient team or survivors of some form of injury, such as an application for survivors of domestic violence, sexual abuse, or drug addiction, be sure to read Section 7, which covers that position directly and should be handled a bit different. The purpose of this design is to prioritize safety when creating a more general product with a broad user base ( which, as we already know from statistics, will include some groups who need to be protected from harm ). Chapter 7 is focused on products that are specifically for vulnerable groups and people who have experienced trauma.

    Step 1: Conduct research

    A thorough analysis of how your technology might be used to abuse people as well as a detailed analysis of the experiences of those who have survived and perpetrated that kind of abuse should be included in the design research. At this stage, you and your team will investigate issues of interpersonal harm and abuse, and explore any other safety, security, or inclusivity issues that might be a concern for your product or service, like data security, racist algorithms, and harassment.

    broad-based research

    Your project should begin with broad, general research into similar products and issues around safety and ethical concerns that have already been reported. For example, a team building a smart home device would do well to understand the multitude of ways that existing smart home devices have been used as tools of abuse. If you’re creating an AI product, be aware of the potential for racism and other issues that have been reported in other AI products. Nearly all types of technology have some kind of potential or actual harm that’s been reported on in the news or written about by academics. For these studies, Google Scholar is a useful resource.

    Specific research: Survivors

    When possible and appropriate, include direct research ( surveys and interviews ) with people who are experts in the forms of harm you have uncovered. In order to have a better understanding of the subject and be better positioned to prevent retraumatize survivors, you should interview advocates working in the area of your research first. If you’ve uncovered possible domestic violence issues, for example, the experts you’ll want to speak with are survivors themselves, as well as workers at domestic violence hotlines, shelters, other related nonprofits, and lawyers.

    It is crucial to pay people for their knowledge and lived experiences, especially when interviewing survivors of any kind of trauma. Don’t ask survivors to share their trauma for free, as this is exploitative. While some survivors may not want to be paid, you should always make the offer in the initial ask. Alternative to paying is to donate to a cause fighting the kind of violence the interviewee experienced. We’ll talk more about how to appropriately interview survivors in Chapter 6.

    Abusers specifically: research

    It’s unlikely that teams aiming to design for safety will be able to interview self-proclaimed abusers or people who have broken laws around things like hacking. Don’t make this a goal, rather, try to get at this angle in your general research. Attempt to understand how abusers or bad actors use technology to harm others, how they use it against others, and how they justify or explain the abuse.

    Step 2: Create archetypes

    Use your research’s findings to create the archetypes of abuser and survivor once you’ve finished your research. Archetypes are not personas, as they’re not based on real people that you interviewed and surveyed. Instead, they’re based on your research into likely safety issues, much like when we design for accessibility: we don’t need to have found a group of blind or low-vision users in our interview pool to create a design that’s inclusive of them. Instead, we base those designs on already-existing research to satisfy the requirements of this audience. Personas typically represent real users and include many details, while archetypes are broader and can be more generalized.

    The abuser archetype is someone who views a product as a means of harm ( Fig. 5.2 ). They may be trying to harm someone they don’t know through surveillance or anonymous harassment, or they may be trying to control, monitor, abuse, or torment someone they know personally.

    The survivor archetype refers to a person who is being abused with the product. There are various situations to consider in terms of the archetype’s understanding of the abuse and how to put an end to it: Do they need proof of abuse they already suspect is happening, or are they unaware they’ve been targeted in the first place and need to be alerted ( Fig 5.3 )?

    You may want to make multiple survivor archetypes to capture a range of different experiences. They may be aware of the abuse is occurring but not be able to stop it, such as when a stalker keeps figuring out where they are from ( Fig. 5.4), or they may be aware that it is happening but are unable to stop it ( such as when an abuser locks them out of IoT devices ). Include as many of these scenarios as you need to in your survivor archetype. These will be used later when you create solutions to help your survivor archetypes achieve their goals of preventing and ending abuse.

    It may be useful for you to create persona-like artifacts for your archetypes, such as the three examples shown. Focus on their objectives rather than the demographic details we frequently see in personas. The goals of the abuser will be to carry out the specific abuse you’ve identified, while the goals of the survivor will be to prevent abuse, understand that abuse is happening, make ongoing abuse stop, or regain control over the technology that’s being used for abuse. Later, you’ll think about how to help the survivor’s goals and the abuser’s goals.

    And while the “abuser/survivor” model fits most cases, it doesn’t fit all, so modify it as you need to. For example, if you uncovered an issue with security, such as the ability for someone to hack into a home camera system and talk to children, the malicious hacker would get the abuser archetype and the child’s parents would get survivor archetype.

    3. Brainstorming issues

    After creating archetypes, brainstorm novel abuse cases and safety issues. You’re trying to identify completely new safety issues that are unique to your product or service by using the term” Novel” in terms of things that are not found in your research. The goal with this step is to exhaust every effort of identifying harms your product could cause. You aren’t worrying about how to prevent the harm yet—that comes in the next step.

    What other abuses could your product be used for besides what you’ve already discovered through your research? I recommend setting aside at least a few hours with your team for this process.

    Try conducting a Black Mirror brainstorming session if you want to start somewhere. This exercise is based on the show Black Mirror, which features stories about the dark possibilities of technology. Try to figure out how your product would be used in an episode of the show—the most wild, awful, out-of-control ways it could be used for harm. Participants typically have a lot of fun when I lead Black Mirror brainstorms ( which is great because having fun when designing for safety! ). I recommend time-boxing a Black Mirror brainstorm to half an hour, and then dialing it back and using the rest of the time thinking of more realistic forms of harm.

    You may still not feel confident that you have found every possible source of harm after identifying as many opportunities for abuse as possible. A healthy amount of anxiety is normal when you’re doing this kind of work. It’s common for teams designing for safety to worry,” Have we really identified every possible harm? What if something is missing, then? If you’ve spent at least four hours coming up with ways your product could be used for harm and have run out of ideas, go to the next step.

    It’s impossible to say for sure that you’ve done everything, but instead of striving for 100 % assurance, acknowledge that you’ve done everything, and pledge to prioritize safety going forward. Once your product is released, your users may identify new issues that you missed, aim to receive that feedback graciously and course-correct quickly.

    Step 4: Design solutions

    You should now be aware of the ways your product can be used for harm as well as survivor and abuser archetypes describing opposing user objectives. The next step is to identify ways to design against the identified abuser’s goals and to support the survivor’s goals. This is a good addition to existing design processes where you’re making recommendations for solutions to the various issues your research has identified.

    Some questions to ask yourself to help prevent harm and support your archetypes include:

    • Can you design your product in such a way that the identified harm cannot happen in the first place? What barriers can you place to stop the harm from occurring if not?
    • How can you make the victim aware that abuse is happening through your product?
    • How can you assist the victim in understanding what they need to do to stop the problem?
    • Can you identify any types of user activity that would indicate some form of harm or abuse? Could your product help the user access support?

    In some products, it’s possible to proactively detect harm is occurring. For example, a pregnancy app might be modified to allow the user to report that they were the victim of an assault, which could trigger an offer to receive resources for local and national organizations. Although it’s not always possible to be this proactive, it’s worthwhile to spend a half hour talking about how your product could help the user receive help in a safe manner if any kind of user activity would indicate some form of harm or abuse.

    That said, use caution: you don’t want to do anything that could put a user in harm’s way if their devices are being monitored. If you do offer some kind of proactive help, always make it voluntary, and think through other safety issues, such as the need to keep the user in-app in case an abuser is checking their search history. In the next chapter, we’ll examine a good illustration of this.

    Step 5: Test for safety

    The final step is to evaluate your prototypes from the perspective of your archetypes, who wants to harm the product and the victim of the harm who needs to regain control over the technology. Just like any other kind of product testing, at this point you’ll aim to rigorously test out your safety solutions so that you can identify gaps and correct them, validate that your designs will help keep your users safe, and feel more confident releasing your product into the world.

    Ideally, safety testing happens along with usability testing. If you work for a company that doesn’t conduct usability testing, you might be able to use safety testing to deftly perform both. A user who uses your design while trying to use it against someone else can also be encouraged to point out interactions or other design details that don’t make sense.

    You’ll want to conduct safety testing on either your final prototype or the actual product if it’s already been released. It’s okay to test an existing product that wasn’t created with safety goals in mind right away; “etrofitting” it for safety is a good thing.

    Remember that testing for safety involves testing from the perspective of both an abuser and a survivor, though it may not make sense for you to do both. Alternatively, if you made multiple survivor archetypes to capture multiple scenarios, you’ll want to test from the perspective of each one.

    You as the designer are most likely too closely connected to the product and its design at this point, just like other types of usability testing, and you know the product too well. Instead of doing it yourself, set up testing as you would with other usability testing: find someone who is not familiar with the product and its design, set the scene, give them a task, encourage them to think out loud, and observe how they attempt to complete it.

    Abuse testing

    The goal of this testing is to understand how easy it is for someone to weaponize your product for harm. Unlike with usability testing, you want to make it impossible, or at least difficult, for them to achieve their goal. Use your product to try to accomplish the objectives in the abuser archetype you created earlier.

    For example, for a fitness app with GPS-enabled location features, we can imagine that the abuser archetype would have the goal of figuring out where his ex-girlfriend now lives. You’d make every effort to track down another user’s location who has their privacy settings turned on with this in mind. You might try to see her running routes, view any available information on her profile, view anything available about her location ( which she has set to private ), and investigate the profiles of any other users somehow connected with her account, such as her followers.

    If by the end of this you’ve managed to uncover some of her location data, despite her having set her profile to private, you know now that your product enables stalking. Reverting to step 4 and figuring out how to stop this from occurring is your next step. You may need to repeat the process of designing solutions and testing them more than once.

    testing for a Survivor

    testing for a Survivor involves identifying how to give information and power to the survivor. It might not always make sense based on the product or context. Thwarting the attempt of an abuser archetype to stalk someone also satisfies the goal of the survivor archetype to not be stalked, so separate testing wouldn’t be needed from the survivor’s perspective.

    However, there are cases where it makes sense. A survivor archetype’s goal, for instance, would be to discover what causes the temperature change when they aren’t altering it themselves. You could test this by looking for the thermostat’s history log and checking for usernames, actions, and times, if you couldn’t find that information, you would have more work to do in step 4.

    Another goal might be regaining control of the thermostat once the survivor realizes the abuser is remotely changing its settings. Are there any instructions that explain how to remove a user and change the password, and are they simple to locate? For your test, this would involve trying to figure out how to do this. This might again reveal that more work is needed to make it clear to the user how they can regain control of the device or account.

    Stress testing

    To make your product more inclusive and compassionate, consider adding stress testing. This concept comes from Design for Real Life by Eric Meyer and Sara Wachter-Boettcher. The authors noted that personas typically focus on happy people, but that happy people are frequently anxious, stressed out, unhappy, or even go through a bad day. These are called” stress cases”, and testing your products for users in stress-case situations can help you identify places where your design lacks compassion. More information about how to incorporate stress cases into your design can be found in Design for Real Life, as well as in many other effective methods for compassionate design.