As of right now, there are 947 Star Trek shows streaming, totaling 820 days of viewing time, from Star Trek: The Original Series to Star Trek: Weird New Worlds. There are also 13 theatrical Star Trek movies in circulation, plus one direct-to-streaming movie, which rack up another roughly ]… ]
Does Star Trek Also Need a Franchise in Film? The Eternal Discussion appeared initially on Den of Geek.
Donkey Kong, the titular ape headlining the bank’s 1981 arcade game, helped Nintendo create a popular foothold in the American gaming industry. It wasn’t Mario Bros. or The Legend of Zelda that were Nintendo‘s breakout titles. Since then Donkey Kong has become a fixture for the business, either as a supporting figure for Mario-led outfit matches or his own collection of starring trophies across Nintendo‘s many household and portable computers. The company’s burgeoning Nintendo Switch 2 period has seen this, with Donkey Kong Bananza the most talked-about name in the Switch 2 build collection.
Donkey Kong has a longstanding record within the video game industry, though the number of activities that he generally stars in aren’t quite as talented as some of his other Nintendo rivals. Having said that, Donkey Kong has appeared in at least one sport on nearly every major Nintendo console and continues to be a key asset to the business. Here are the leading 10 best Donkey Kong game ranked, not counting his supporting figure opera performances.
10. Donkey Kong 64 ( 1999 )
Many people have no poorly demonized the 1999 film Donkey Kong 64 as an stuffed collect-a-thon on the Nintendo 64, so we’re starting off with a somewhat controversial access. To this popular criticism’s funds, the activity does have you record many of the same levels with various characters—something 2004’s Super Mario 64 DS even did without as much backlash—but that overlooks the stage. In fact, Donkey Kong 64 surpassed its contemporaries in the genre, not only catapulting Donkey Kong and his friends into the world of 3D platforming.
There is an under-appreciated depth to Donkey Kong 64, particularly in its rich level design and atmospheric musical score composed by Grant Kirkhope. After the success of Super Mario 64 and Banjo-Kazooie, slop that many retrospective reviews don’t take into account also, which was a ton of slop that Donkey Kong 64 clearly stood a cut above when it first came out. Certainly not without its flaws, Donkey Kong 64 deserves far more love than it gets these days, or at least a less dubious reputation.
9. Donkey Kong Jungle Beat ( 2004 )
The tradition of quirky peripherals that were present in the Nintendo GameCube at the beginning of the 21st century is still present in the Nintendo home consoles. After introducing the DK Bongos, a bongo drum peripheral for the GameCube and 2003’s Donkey Konga, the peripheral was given more optimized gameplay experience in 2004’s Donkey Kong Jungle Beat. The game moves in a side-scrolling platformer controlled by the drums, continuing the rhythm-based gameplay from Donkey Konga.
One of the most accessible Donkey Kong games in terms of difficulty, Jungle Beat takes the DK Bongos to their logical apex in usage. There is something fundamentally cathartic about pounding on a set of bongos to defeat an intimidating boss, in addition to providing a unique mechanic for moving across the levels. A forgotten entry in the Donkey Kong franchise because of its signature peripheral, Donkey Kong Jungle Beat should receive an update given the possibilities through Nintendo’s continued motion control support.
8. Mario vs. Donkey Kong ( 2004 )
There was a time when Mario and Donkey Kong were bitter rivals, even though they may now be merely pals playing various Nintendo video games like Mario Kart and Mario Party. That antagonistic history is revisited in 2004’s Mario vs. Donkey Kong for the Game Boy Advance, the spiritual successor to 1994’s Donkey Kong on the original Game Boy. Mario owns and runs his own toy factory, which Donkey Kong raids for its well-known line of wind-up Mini-Mario figures, according to the game’s offbeat plot.
Mario vs. Donkey Kong ups the ante from the puzzle-solving gameplay and traversal present in the 1994 Game Boy game, adding a new wrinkle with the presence of the Mini-Marios which have to be navigated to safety. The Nintendo Switch received a surprise remake in 2024, significantly improving the technical presentation and making the controls more user-friendly for the contemporary console. While we’re certainly happy that Mario and Donkey Kong play nice again these days, Mario vs. Donkey Kong is a fresh take on one of gaming’s oldest beefs.
7. Donkey Kong Country Returns ( 2010 )
Developer Retro Studios did the same for Donkey Kong with the Wii’s Donkey Kong Country Returns in 2010 after completely revitalizing the Metroid franchise. Returning to the side-scrolling platforming that made Rare’s original Donkey Kong Country trilogy such a major success on the Super Nintendo, the game has Donkey and Diddy Kong take on a new villain, the Tiki Tak Tribe. In a change from the previous series titles, the game also allows for two-player simultaneous co-op, with the second player controlling Diddy.
Donkey Kong Country Returns is a welcome, hurm, return to form for the franchise, although not without a few bumps in its execution. The Wii revival has a faster pace than the first three games, which highlights how frustrating the console’s motion controls can be. The game received slightly enhanced remasters on the Nintendo 3DS and Switch, upgrading the visual presentation, though its gameplay flaws are still present and these remasters don’t add all that much to the overall experience.
6. Donkey Kong Country 3: Dixie Kong’s Double Trouble! 1996 )
At the twilight of the Super Nintendo’s lifecycle, and after the Nintendo 64 had already launched, Rare released one final Donkey Kong Country game for the SNES: 1996’s Donkey Kong Country 3: Dixie Kong’s Double Trouble! In the same way that Donkey Kong Country 2 removed Donkey Kong himself, its sequel also removes Diddy, making him the new playable character Kiddy Kong. Together, Dixie and Kiddy set out to rescue Donkey and Diddy from Baron K. Rool in a northern region with its geography inspired by Scandinavia and Canada.
Although Donkey Kong Country 3 may be the series ‘ weakest entry, it still manages to be a good one and introduces some interesting additions, most notably an open hub map and vehicles. But the game just doesn’t quite feel as inspired as its two predecessors, even with the protagonist swap to introduce Kiddy. Donkey Kong Country 3 retains the core appeal as it traverses stale territory in Donkey Kong Country 3, a strong but seemingly obligatory coda to the original Donkey Kong Country trilogy.
5. Tropical Freeze ( 2014 ): Donkey Kong Country
Relegated to being a supporting character for years, Cranky Kong makes his playable debut with 2014’s Donkey Kong Country: Tropical Freeze for the Wii U, joined by a returning Dixie. The attacking Snowmads, an army of arctic animals plotting to conquer Donkey Kong Island and plunge it into the unending winter, interrupt Donkey Kong’s birthday party. The Kongs battle their way back to the heart of their native island, defeat the Snowmads and defrost their home from its newly icy condition.
Tropical Freeze significantly improves the gameplay mechanics and level design compared to Donkey Kong Country Returns. At the same time, the difficulty remains as high as ever while the overall number of levels is reduced from its predecessor. The definitive Tropical Freeze experience is enhanced by the Nintendo Switch’s improved remaster, which adds Funky Kong as a playable character.
4. Donkey Kong Country ( 1994) )
To anyone who was around and playing video games in 1994, the original Donkey Kong Country was a huge deal when it debuted on the Super Nintendo that year. There was nothing else that looked that good on the console market at the time thanks to its crisp, pre-rendered graphics, which helped orient the industry towards more 3D aesthetics. The game’s story is simple: King K. Rool raids Donkey Kong Island and steals Donkey Kong’s vast stash of bananas, prompting the ape and his nephew Diddy, in his first appearance, to recover their purloined fruit.
We wouldn’t still be talking about Donkey Kong Country 30 years after its launch if it had only had that initial wow factor from its pre-rendered presentation. But more than just its eye-catching visuals, the game completely redefined Donkey Kong down to his character design and reestablished him as a core Nintendo property. This first game brings together impressive technical presentation, an instant-classic score composed primarily by Grant Kirkhope, and an engaging side-scrolling platformer experience that all others combine to create a legacy.
3. Donkey Kong ( 1994 )
Initially 1994’s Donkey Kong on the Game Boy looks and feels like a smoother, more intuitive port of the classic 1981 arcade game of the same name. The 1994 video game turns into a full-on adventure after completing the four levels of the arcade title, which includes 97 more levels in nine different worlds. Joining Donkey Kong in trying to stay one step ahead of Mario is Donkey Kong Jr. while the mustached plumber gains a new set of moves to keep up with the apes.
While ambitiously building upon these foundations, The Game Boy Donkey Kong is a love letter to both the original arcade and its 1982 sequel Donkey Kong Jr. At its core, the game is more of a puzzle-solving experience than a platforming one, with that distinction more evident in the level design as players progress. That provides a fresh take on a well-known premise and a significant improvement over the franchise’s 1994 version of Donkey Kong.
2. Diddy’s Kong Quest, Donkey Kong Country 2, and Donkey Kong Country 2 ( 1995 )
If Donkey Kong Country revolutionized the way we looked at side-scrolling platformers, its 1995 sequel Donkey Kong Country 2: Diddy’s Kong Quest used that as a springboard to make the ultimate side-scrolling Donkey Kong experience. As the title suggests, Diddy steps up as the main character, working with his recently engaged girlfriend Dixie Kong to save Donkey from Kaptain K. Rool. The duo travel to the pirate warlord’s hideout on Crocodile Isle where they each use their unique abilities to traverse 52 levels and rescue Diddy’s uncle.
Donkey Kong Country 2 is one of those situations where bigger does actually mean better, with more secrets, more animal companions to temporarily control, and more enemy types to defeat. The level design is more ambitious and just how differently Diddy and Dixie each play make for a much deeper and richer experience than its predecessor. The sequel stands as the apex of side-scrollers and one of the best games that developer Rare has ever made. It is an overall improvement over the original Donkey Kong Country.
1. Donkey Kong Bananza ( 205 )
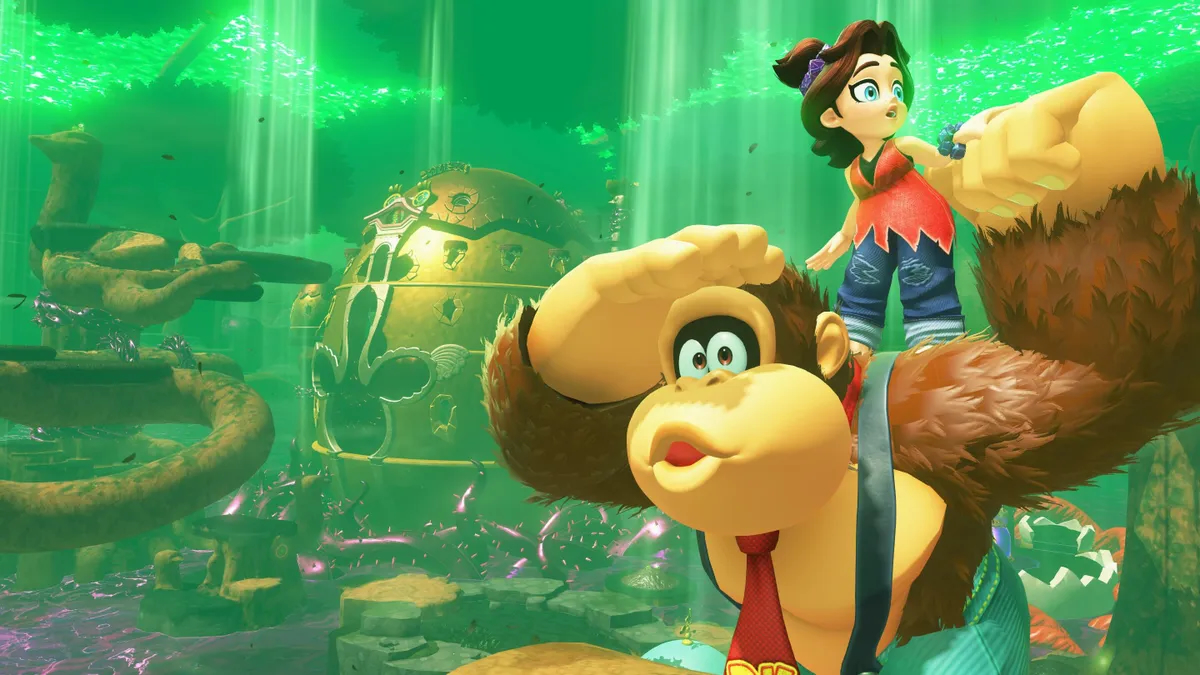
Released a full month after the Nintendo Switch 2’s launch, Donkey Kong Bananza became the most buzzed-about game from the console’s library, even over Mario Kart World. Donkey Kong Bananza successfully transformed its heroic ape into a full-fledged 3D platformer experience based on the character’s veritable strength by placing him in destructible environments, earning both praises. The game has Donkey Kong travel to Ingot Isle to harvest Banandium Gems, teaming up with a teenage Pauline against the sinister VoidCo mining company eager to obtain the Banandium Root, no matter the cost to the environment.
Donkey Kong Bananza repositions the marquee Nintendo franchise, starting with the immersive level design, side-scrolling homages straight from the original Donkey Kong Country in a fun and moving tribute, and a redesigned Donkey Kong character with plenty of personality. But for all its celebration of the entire history of all things Donkey Kong, Bananza is just a lot of fun, with its key gameplay mechanic of literally tearing through environments being incredibly cathartic. In this game, players can go crazy and smash everything in their path. A subtle reinvention of what’s possible for a Donkey Kong game, Donkey Kong Bananza is Nintendo’s best 3D platformer since at least 2017’s Super Mario Odyssey, and the most unabashedly fun Donkey Kong game in, well, ever.
On Den of Geek, Donkey Kong video games were first ranked among absolute bananas.