M. Night Shyamalan will be taking part in a review of his work at Film at Lincoln Center for the coming week. It is there that most of Shyamalan’s work is being screened ( in 35mm when possible ) and paired with some of the idiosyncratic filmmaker’s favorite touchstones. For instance, Old is a film about people who can’t physically [ …].
The article M. Night Shyamalan Displays on His’ Resurrection’ Period Following After Earth Sorrow appeared second on Den of Geek.
CGI is a significant component of contemporary blockbusters, whether we’re talking about Superman or Snow White. Trivia geeks know that CGI has been a part of films since laptops were used to help make the starting names of 1958’, s Vertigo. However, the 1990s—, and frequently at its worst, a la The Lawnmower Man‘s absurd virtual worlds or Spawn‘s unpleasant hellscapes, are what most people think of when they think of the beginning of CGI in movies. Nevertheless, there are a surprising number of videos that also look very great, even decades later.
The physical effects designers on these movies contributed to the creation of images that endured over time, whether it’s as a result of the first explosion of technical innovation or the realization that occasionally restraint is preferable to excess.
Terminator 2: Judgment Day ( 1991 )
James Cameron should decide how to proceed. For as much as people like to scold the obviously false head used in the restoration scene from The Terminator, every single consequence in ( the much more expensive ) Terminator 2 also holds up now. In fact, the T-1000’s shapeshifting is so amazing that it still retains its gold ( silver ) appearance. regular for music films.
Part of the success of the film ’, which will become a design in this list, is when Cameron knows when to use practical results and when to use computers. He used make-up and accessories whenever feasible, including creating a robotic for Robert Patrick to use as the bullet-riddled T-1000. However, that shouldn’t detract from the care Cameron and ILM took in creating the actual CG, which made the T-1000’s shifts feel like actual ( and genuinely terrifying ) regions of this world.
Beauty and the Beast ( 1991 )
The second fully-CG animated feature film, Toy Story, is the first one to come to mind when describing computer graphics and 90s video. But even the most hardcore Woody ’, s Summary watcher has to confess that the photos of Toy Story look very harsh today. Similar cannot be said of Beauty and the Beast and its expansive Board room set.
For most of Beauty and the Beast, managers Gary Trousdale and Kirk Wise apply hand-drawn graphics. Trousdale and Wise called upon the CG officer Jim Hillin to force the Pixar-developed Computer Animation Creation System further than it had been before for the striking ballroom dancing series, which features the lovely title ballad. The result is something great and beautiful, a second scene that totally sells the passionate change of heart for Belle and the Beast.
Death Becomes Her ( 1992 )
On one hand, Death Becomes Her is an oddity in the film of Robert Zemeckis. The relationship between two women ( Meryl Streep and Goldie Hawn ), whose bodies change as they vie for the affections of a doofy plastic surgeon ( Bruce Willis ), feels more at home on Broadway ( where there is currently a smashing musical adaptation of the movie ) than it does with Zemeckis’, Boomer classics Back to the Future and Forrest Gump.
With that said, the extraordinary results in Death Becomes Her truly are the function of a tech-obsessed cinematographer. The cartoon-logic teachings that Zemeckis learned from the film Who Framed Roger Rabbit in 1988 are applied to this film. and applies them to real folks. The persona of Streep with her nose twisted around or Hawn with a hole in her abdomen should be a nightmare, but Death Becomes Her turns them into camp video secret.
Jurassic Park ( 1993 )
When stop-motion artist Phil Tippett saw the electric animals ILM was creating for Jurassic Park, he informed Dennis Muren, “, We’, be dead, according to behind-the-scenes traditions. ”, Thankfully Tippett continues to work (you may have seen his graphics in a time one instance of Poker Face ), but his concerns were justified. Jurassic Park‘s dinosaurs still look incredible, maybe even better than beasties in afterwards Jurassic World appearances. The introduction of the animals furthermore stands as one of Steven Spielberg’, s most awe-inspiring events, perhaps within a film filled with wonder.
Of course, Jurassic Park succeeds in piece because Steven Spielberg heavily relies on Stan Winston’, s puppetry. Not only did Winston, Tippett, and the team figure out the fat and movements of the raptors, but they also created mechanical puppets to communicate with the actors as much as possible. Judasic Park was able to demonstrate how much restraint can be, something that those who followed too frequently forgot.
Forrest Gump ( 1994 )
Forrest Gump has only lost ground in public opinion in the three decades since its triumphant Academy Award-winning run. Modern viewers may question its conservative politics and Boomer nostalgia-baiting, but no one can take exception with Forrest Gump‘, s special effects.
In a time of deep-fakes, the trick of putting Tom Hanks ‘, idiot savant, Richard Nixon and John Lennon on news reels works pretty well for the modern audience. Even better is everything involving Lieutenant Dan, for which Ken Ralston and his team at ILM digitally removed Gary Sinise’, s legs to make the actor appear paraplegic. Forrest Gump maintains its focus on the past without distracting viewers with futuristic razzle-dazzle thanks to their work.
The Mask ( 1994 )
The Mask uses significantly less CGI than one might anticipate, much like Jurassic Park. Unlike Jurassic Park, most of those non-CG effects are all the work of one man, Jim Carrey and his incredible face. Carrey’s rubber-faced tour de force shouldn’t, however, detract from how competent ILM animation director Wes Takahashi and his team made Carrey into a true cartoon.
Unlike so many of the entries on this list, the effects in The Mask do not look realistic, but that ’, s the point. The Mask still feels like we’re watching a Tex Avery cartoon invade the real world, and Carrey’s mousey Stanley Ipkiss ‘ abilities when he dons the titular mask are supposed to feel weird.
Babe ( 1995 )
It’s much easier to animate non-human objects, including animals, than it is to animate humans, according to the Pixar special effects team, because we viewers are too aware of what people should look like. But as ’, 90s hits such as Anaconda and Jumanji demonstrated, it can be pretty darn hard to make effective CG animals as well.
Which is just one of many reasons why George Miller co-wrote and directed Chris Noonan’s film Babe, which feels like a miracle. The animals on Hoggett Farm look like actual pigs, dogs, and sheep, even when they speak with the voices of Christine Cavanaugh, Hugo Weaving, and Miriam Flynn. Rhythm &, Hues Studios, Animal Logic, and ( of course ) Jim Henson’s Creature Shop is a success thanks to the work of effects houses, Hues Studios, Animal Logic, and ( of course ) Jim Henson, so that the animals are actually entertaining to watch.
Men in Black ( 1997 )
The Mask‘s greatest special effect is not at all digital, as it was in The Mask; instead, it is an actor’s performance as Vincent D’ and Onofrio as a bug that resembles an Edgar farmer. That said, D’, Onofrio has room to stand out precisely because he’, s surrounded by absurd images that fit right in within the world. Edgar is just one more oddity, along with Tony Shalhoub regenerating his own head and squid babies and coffee-obsessed creatures.
Many of those elements stem from Rick Baker and his team, who first built puppets and maquettes based on input from director Barry Sonnenfeld and producer Steven Spielberg. Artists at ILM digitized and animated the creatures from that foundation, allowing them to interact with Agent K, Agent K, and Agent J, Agent K.
Starship Troopers ( 1997 )
In terms of alien bugs, Dutch director Paul Verhoeven could have scrimped on the effects of his Robert Heinlein adaptation, Starship Troopers, if he wanted. After all, part of the movie’, s satirical anti-fascist message rests on the fact that the alien Arachnids are marked for extermination precisely because they don’, t look like us.
Instead, Verhoeven gave the visual effects a lot of attention, requiring the assistance of several effects firms, including Phil Tippett, Sony Pictures Imageworks, ILM, Amalgamated Dynamics, and more. They took up half of the film’s$ 110 million budget. Today it ’, s clear that the money and effort was worth it. The creatures have a clear intelligence and personality that helps reinforce the film ’, s subversive themes, and not only are the scenes of the Arachnids decimating human soldiers appropriately upsetting.
Titanic ( 1997 )
One has a suspicion that James Cameron’s initial plan was to simply rebuild the Titanic and plunge it into an iceberg, given his Aguirre-like resolve. Since that was n’, t an option, Cameron did the next best thing, creating incredible models of the ill-fated ship. The ship’s sank and split scenes look incredible, and the boat itself is the only thing that works thanks to the digital effects Cameron uses.
Like hair and fur, water is famously a difficult thing to animate well. Cameron used CG to ground the spectacle in real emotions while working with Pacific Data Images and Digital Domain to continue to advance the water effects he created for The Abyss. Cameron and his team scanned the faces of actors to create digital models, so we could get the sense of real people falling and drowning as the ship went down. Titanic is a spectacular epic and also a very human drama thanks to these efforts.
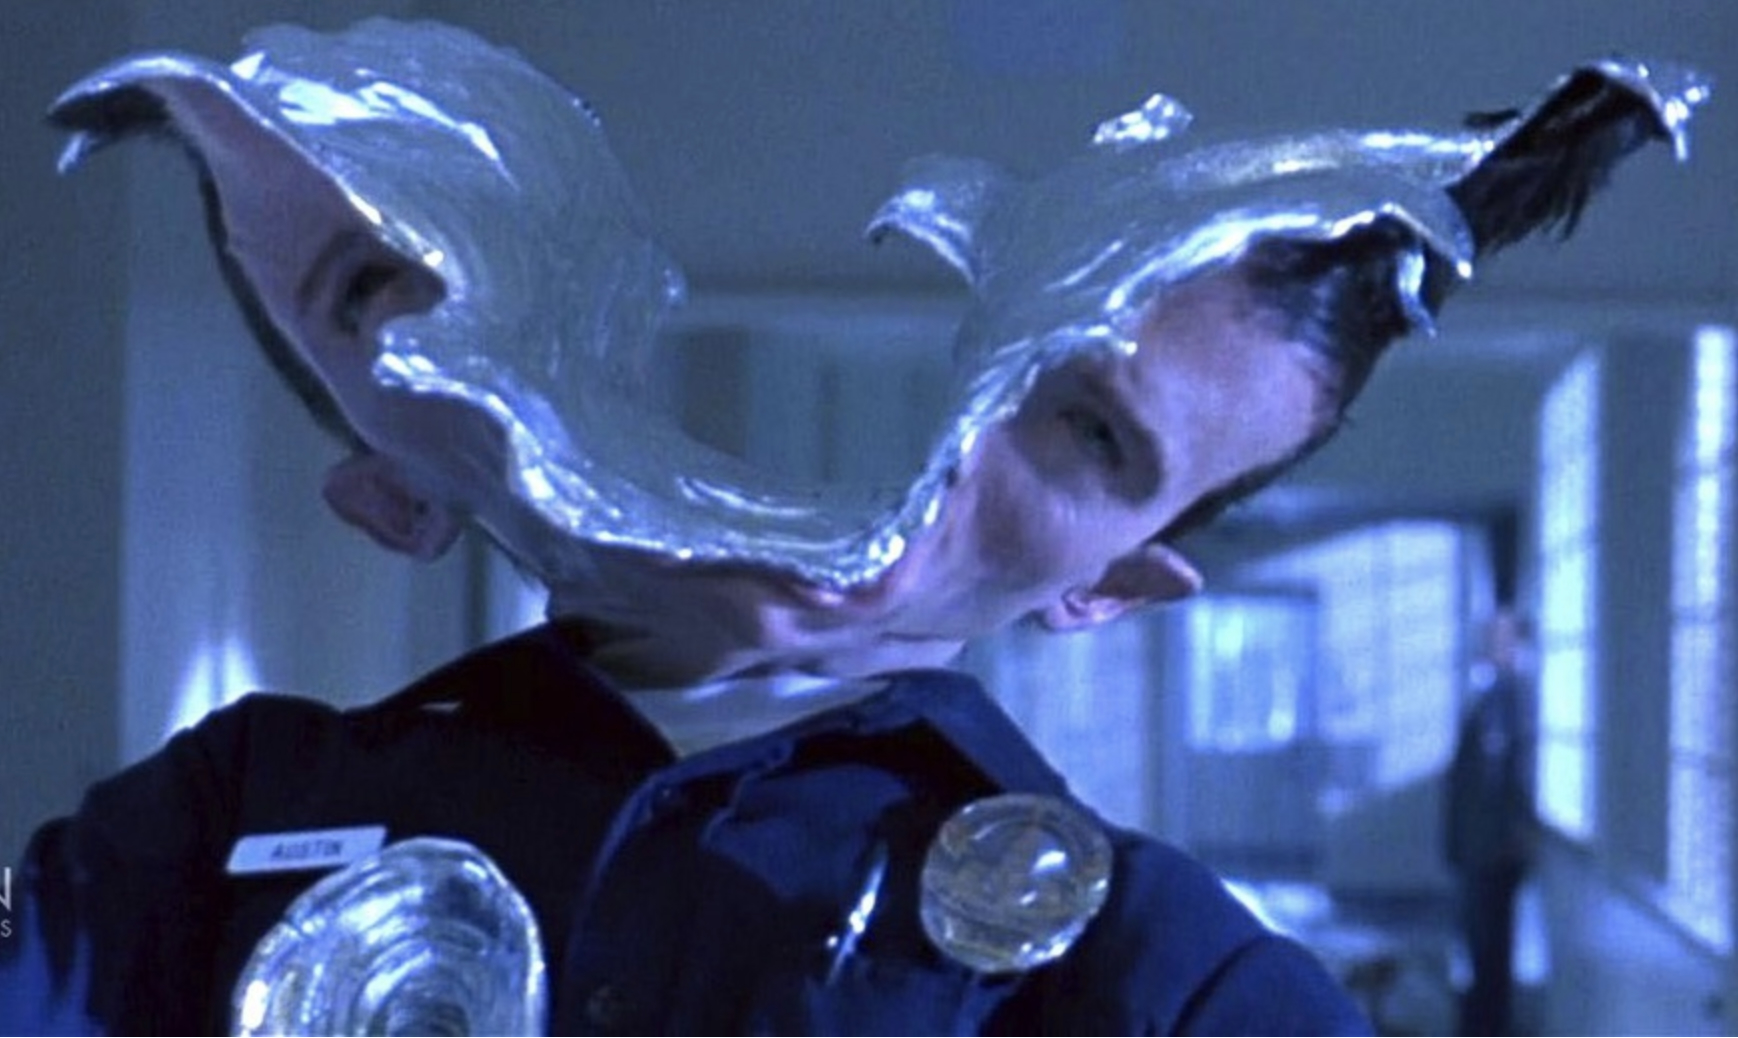
The Matrix ( 1999 )
The Matrix‘s dynamic slow motion system, bullet time, is what most people think of when they think of special effects. Believe it or not, with the exception of some computer pre-visualization, most bullet time sequences were done practically, in-camera. Yet CG was used for many of the film’s standout sequences, which are still captivating viewers.
Images of Keanu Reeves losing his mouth as Neo, or getting enveloped by a mirror, are not as flawless today as they were in 1999. They continue to be incredibly effective in signaling Neo’, s recognition that the world is not what he thought it was, as do the sequences in the film ’, s actual reality, those of humans being turned into batteries and the menacing sentinels.
Star Wars –, Episode I: The Phantom Menace ( 1999 )
Even the most ardent supporter of The Phantom Menace has trouble fully approuving the effects. So much of the lead up to the movie’, s release hyped the digital worlds that George Lucas created with ILM, and so much of the movie’, s wooden dialogue was blamed on those same artificial sets. Even the most hating fan of prequels must admit that, despite the film’s flaws, The Phantom Menace looks fantastic.
It’, s not just the pod racing sequence or the climactic lightsaber duel that hold up —even though they both certainly do. The seascape that Obi-Wan Kenobi and Qui-Gon Jinn traverse while visiting the Gungans, as well as the palace where Amidala controls Naboo, are also the quieter elements. All of these elements still impress, even if The Phantom Menace itself remains divisive.
Little, Stuart ( 1999 )
Given all the groundbreaking, high-concept movies on this list, it might feel like a bit of a letdown to end with a gentle children’, s movie about a mouse adopted by a human family. Anyone who watches Stuart Little today will find that to be exact. Like Babe, Stuart Little had to bring animals to life, namely the titular mouse and the various cats he encounters. The effects had to be good enough to stop the audience of children from being sucked out of the story, just like Babe.
Effects artist Rob Bredow and his team at ILM painstakingly found new methods to create fur and animal expressions that managed to both look realistic and convey emotions. Their efforts received an Oscar nomination for the best visual effects ( losing out to The Matrix ) and, more importantly, the joy experienced by young viewers who had never even realized they were n’#8217, weren’t actually looking at a mouse.
The post 1990s CGI Movies That Still Hold Up Today appeared first on Den of Geek.